Color Your Day…..
The Color Your Day class offered by the Altenew Academy is awesome! Theresa Calvird, the instructor, offers so many tips and ideas! I have several take-aways from this class, from finding inspiration, to balancing color, and more experience with the color wheel.
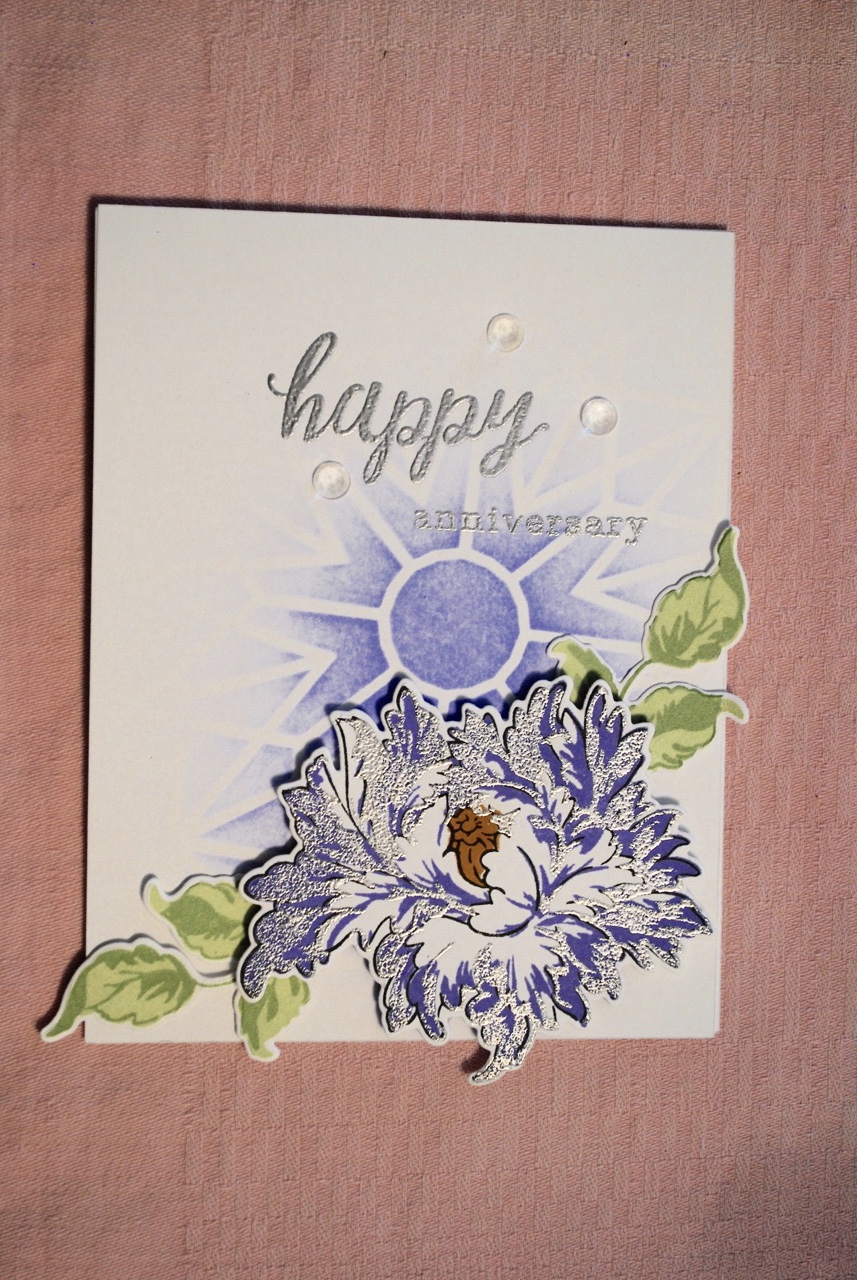
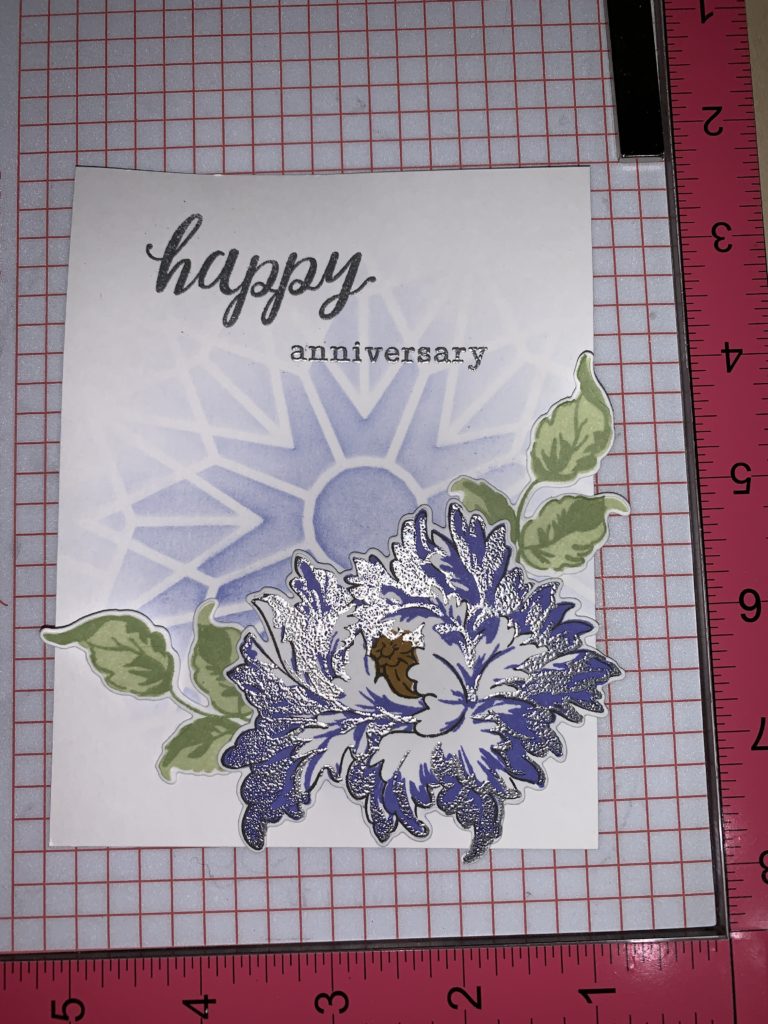
My inspiration for the project I designed for this class came from her color theory, offering a guideline for how much color to use in a card, as well as from one of my sisters. She and her husband celebrated one of those milestone anniversaries this summer, so I wanted to create a card in their favorite color (purple), with silver accents to commemorate their anniversary.
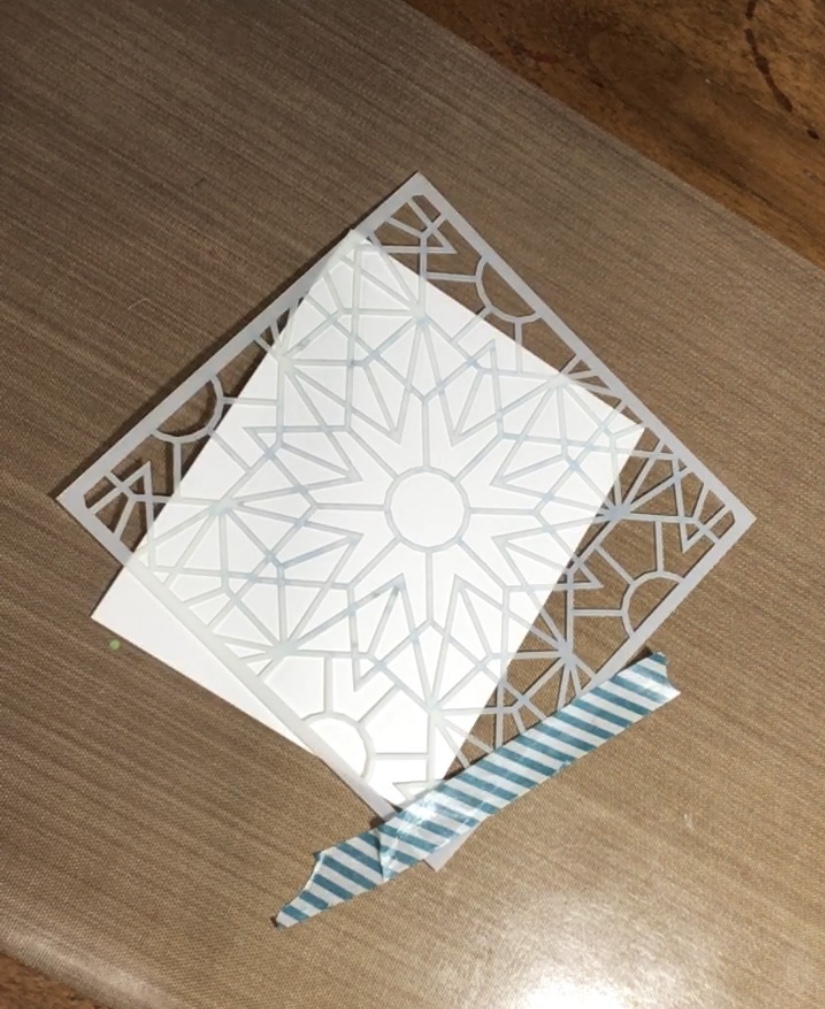
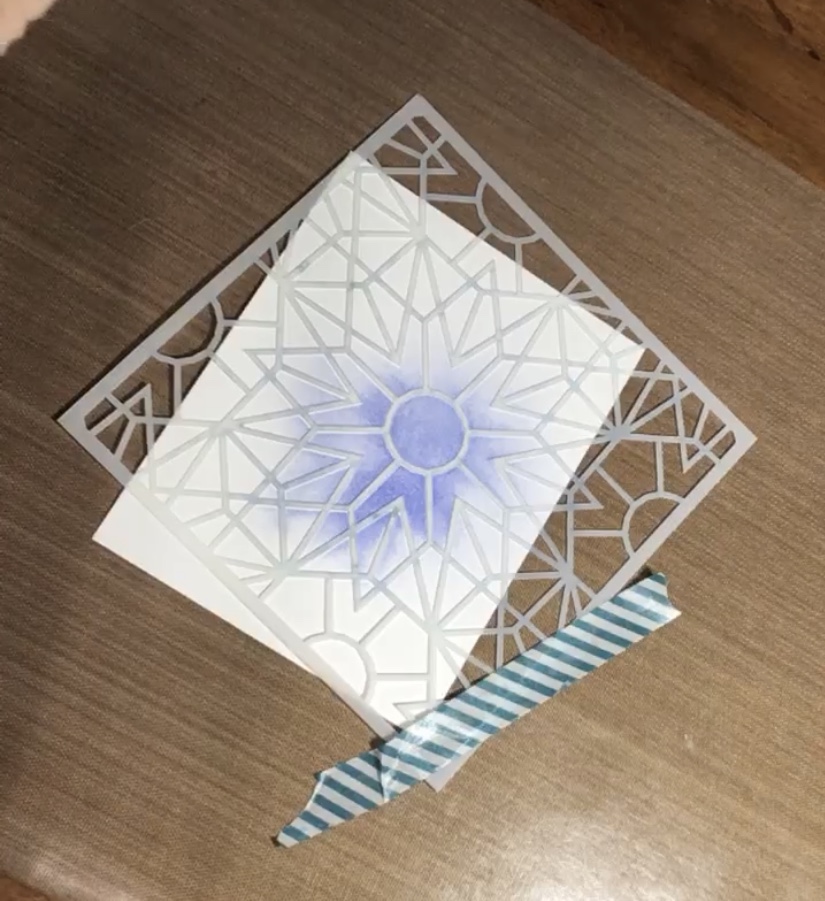
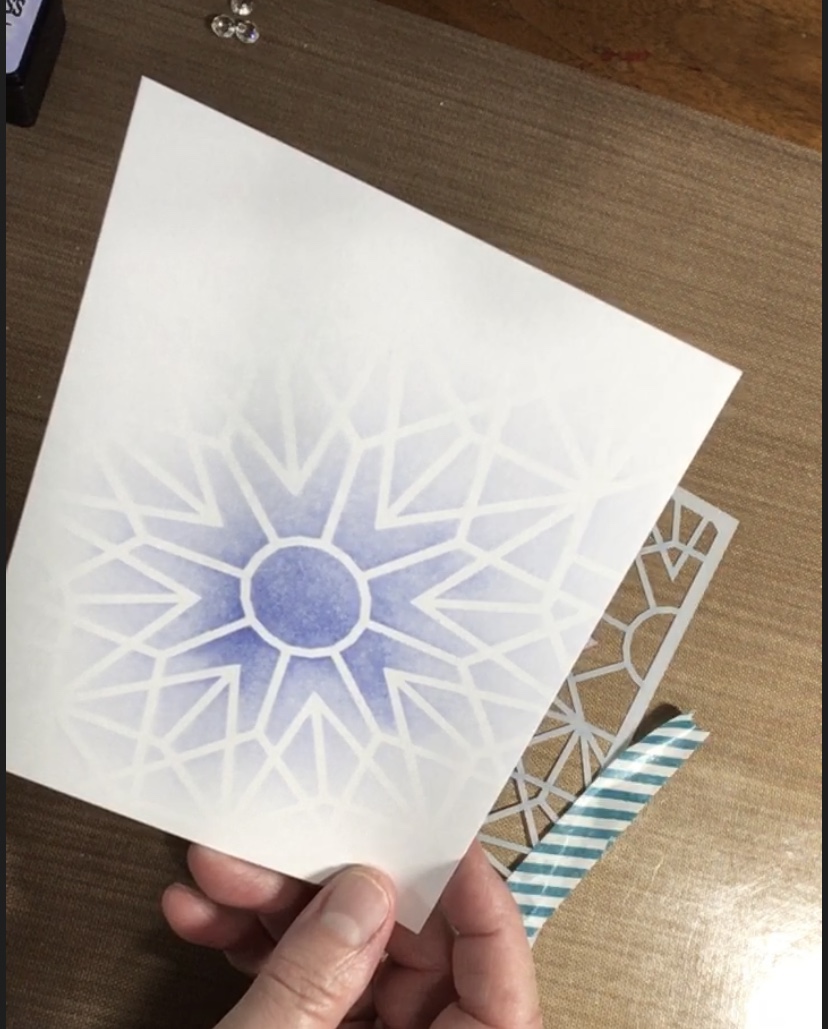
I decided on a monochromatic color scheme, with an ombre feel to the background. I started with my Altenew Kaleidoscope stencil, the A layer, laid over a piece of white card stock on an angle.
I used my blending brushes to blend on shaded lilac distress ink, concentrating the color in the center and fading out to the edges.
I embossed the sentiment Happy Anniversary in silver embossing powder before moving on to the flowers and leaves. I started the flower by stamping the second layer of my Majestic Bloom stamp set in Gina K’s Wild Wisteria ink, then stamped the outline layer in Altenew Jet Black. (It’s easier for me to line up my layers this way!) I then embossed the third layer of the bloom, using silver embossing powder. I stamped the leaves in the same way, stamping the detail layer in Forest Glade, and then the solid layer in Frayed Leaf (both Altenew inks).
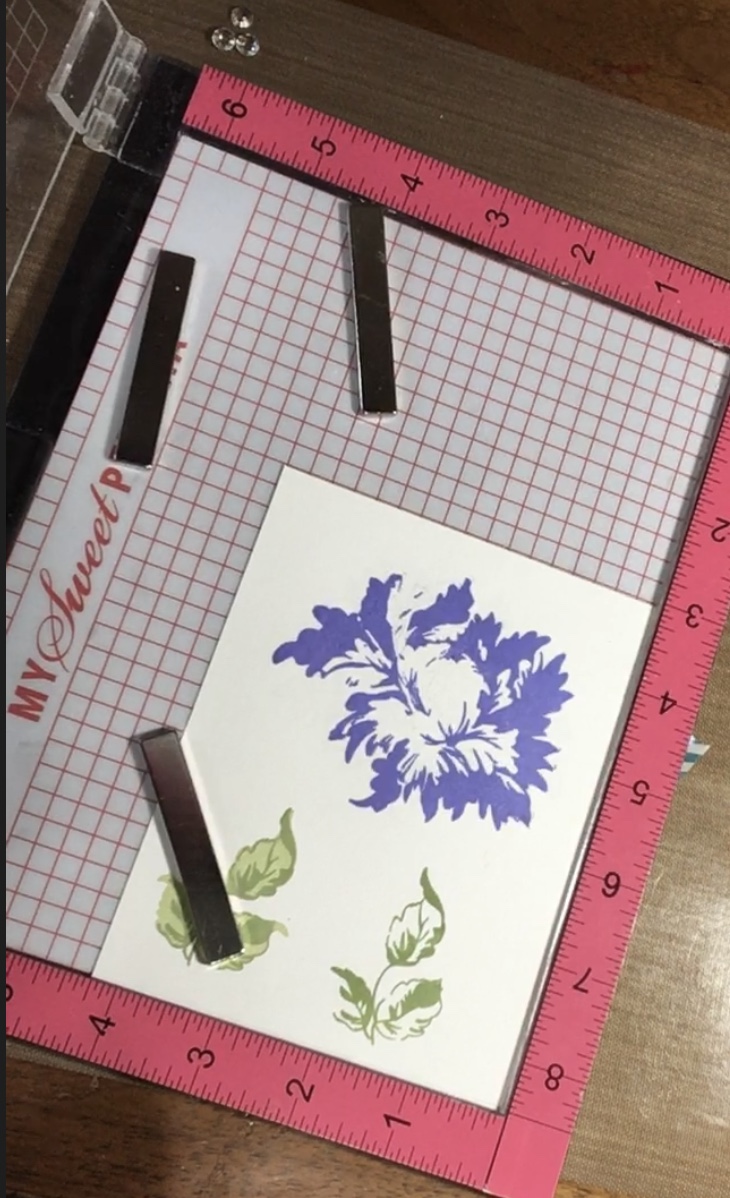
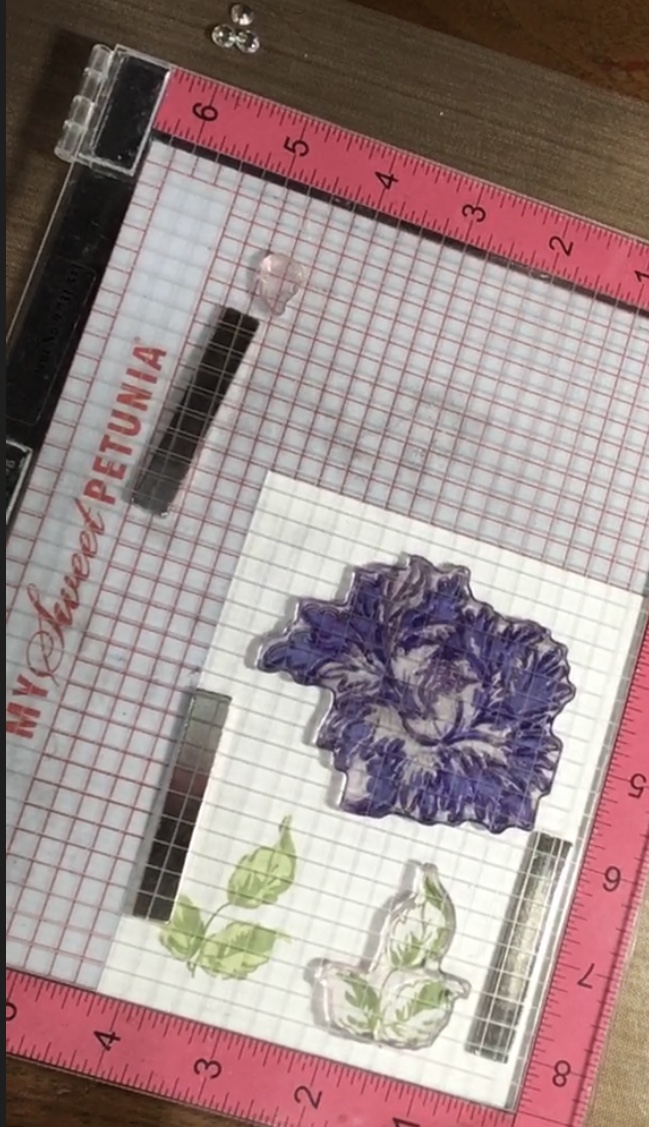
I die cut the flower and leaves using the matching die set, then arranged the leaves and flower in the lower right hand corner, adhering the flower with foam squares to add some dimension. I finished the card off by adding a few gems from Studio Katia.
As always, thank you for reading, and I hope this inspires you to go out and create something!

Vellum Butterflies.


2 Comments
Celeste Reed
❤ Your card is so beautiful and thoughtful!
Erum Tasneem
Your card looks wonderful. The colours are gorgeous! However, I would suggest that next time you move the stencil a bit downward so that the center is covered by the flower a bit since right now there are two focal points of your card, first being the centre of your stencil and the second being the floral arrangement and then there is your sentiment too! All three are on different levels. Always take a step back and look at your card from a distance. Your card layout needs just a bit of tweaking in terms of placement.
Thank you for entering your beautiful work to the AECP assignment gallery.