Ready, Set, T-Shirt Quilt!
Today is post number one for my quilting adventure. Several years ago when my first born graduated from high school, I made my first t-shirt quilt. My intentions were to finish a quilt for each child before they graduated. I succeeded all of one time, with that first born child. I have three children in total and the last two are just 12 months and 2 weeks younger than my first. I am not a quick sewer so my expectations were much too high trying to get two quilts completed in less than one year. So 4 years later I am finally embarking on my final of three t-shirt quilts.
If you look at my posts you will note I am usually a card maker, so this is a departure from my usual creative outlet. (or actually a return to my previous creative outlet) As a young mother I made a few simple quilts and all the Halloween costumes growing up but when you have small children they like to play games and interrupt. I found being distracted and sewing can lead to expensive mistakes as good fabric is quite pricey. My children were more important to me than my crafts so my sewing was laid aside and I discovered paper crafts. If you mess up a piece of paper you are throwing away 25 cents versus dollars of fabric. I also found I could make cards in short spurts or when we were gathered around the TV for movie night. The kids have grown and now I am returning back to my meager sewing roots.
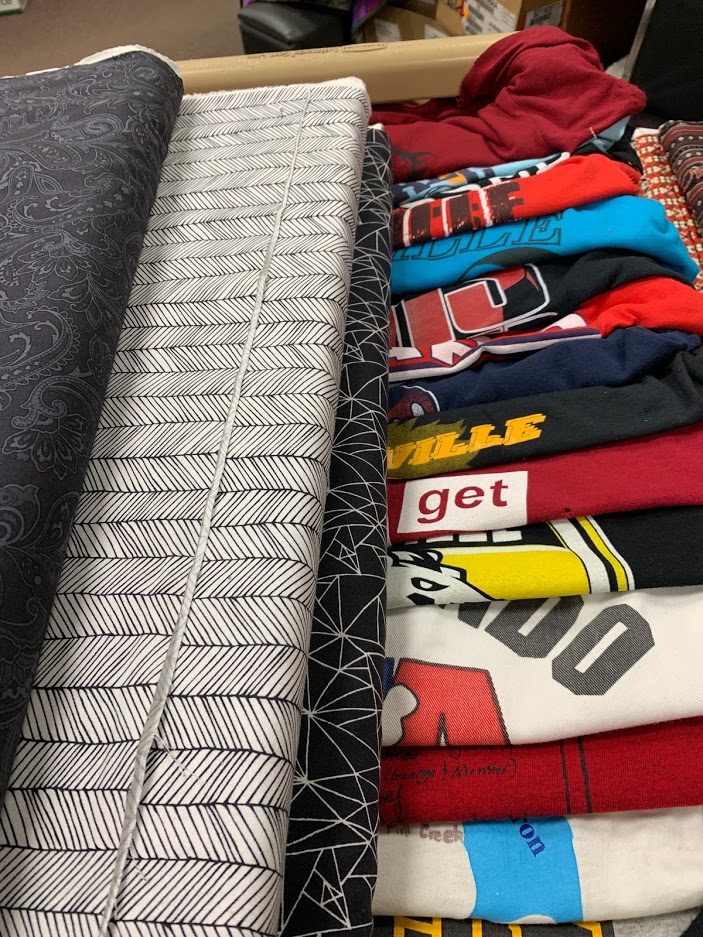
Above is a picture of me testing fabric patterns next to the chosen t-shirts for the quilt. As I am inexperienced I am choosing to make all the blocks the same size despite the logo size. I add a basic window pane frame to each block and then a border. My next quilt will be for me, using the extra t-shirts that didn’t fit into my kids quilts or ones they didn’t want in the their quilt. I think I will branch out and try a collage quilt making the blocks different sizes based on the logo size.

Since t-shirt quilts tend to be a jumble of color, we opted for simple black, white and grey prints. My daughter is an engineer student so she tended to lean towards the more graphic designs.
You will find many ways to make t-shirt quilts on line, this is they way I was taught in a class I took at “Country Stitches” (with a few modifications because my memory is faulty) . I remember the teacher saying the first cut is always the hardest. She was right. Each t-shirt brings a flood of memories back with it. Kids playing sports, drama, graduation, kindergarten. So I think I stared at that first shirt for five minutes before I made that first cut. The first step is to cut the front from the back up the side seams. Usually you can also slice the sleeves off at this time. In my case, my blocks are unusually large because of a specific t-shirt all the kids wore that has the State of Michigan on it. It barely squeezes into a 15 1/2 block so leaving my sleeves on was important for this quilt.
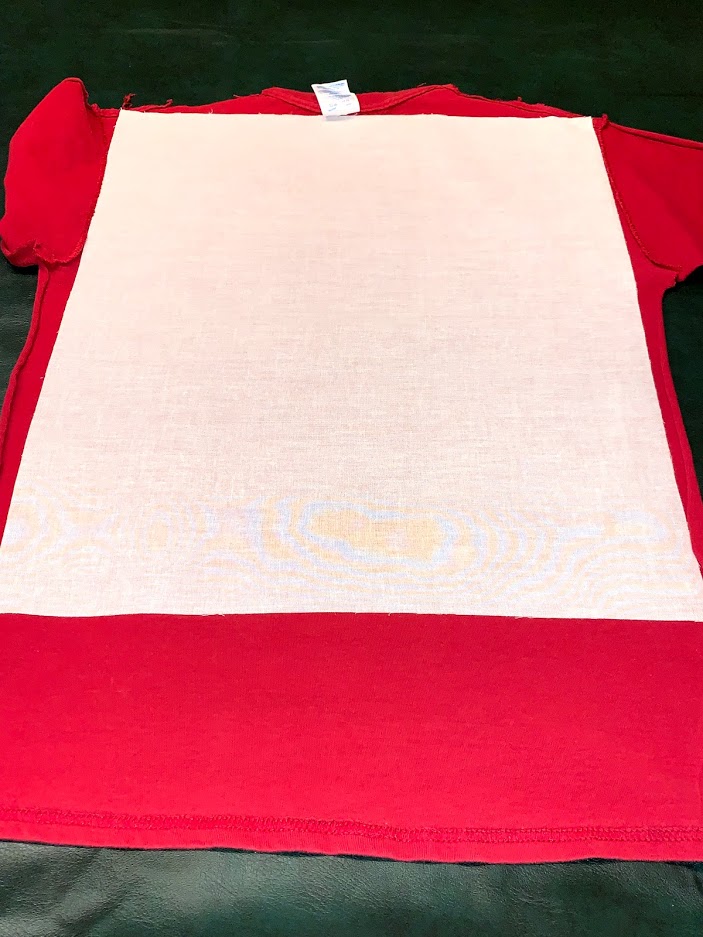
Step two is applying the iron on stabilizer to the back of the t-shirt. The stabilizer is cut two inches bigger than your intended block size and centered behind the logo. Many classes have you cut the logo down first, in my class they suggest leaving the collar on until you have stabilized the logo as t-shirts are notoriously stretching and leaving the collar on helps the logo hold it shape until it is stabilized. Some people think this is a waste of stabilizer but since I am not selling these I don’t mind the extra cost.
Important notes when ironing on the stabilizer. Do not use the iron on the logo side as it could melt onto your iron and ruin the shirt (and possibly the iron plate). Use a pressing cloth between the iron and the stabilizer to keep your iron clean. Follow the heating instructions for the stabilizer so you don’t scorch things.
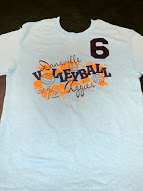
In my next post I will show you a few of the shirts that need special steps. The volleyball t-shirt pictured above is one. The player number is above the collar so I will have to sew a piece of matching t-shirt into the collar area before stabilizing. I have a few really small shirts that will need to be built up to the block size, and one block that is all logos from arms or small chest emblems. Thanks for stopping by. Let me know if you have any specific questions.