Vintage Christmas Cards
Vintage Style Christmas Cards
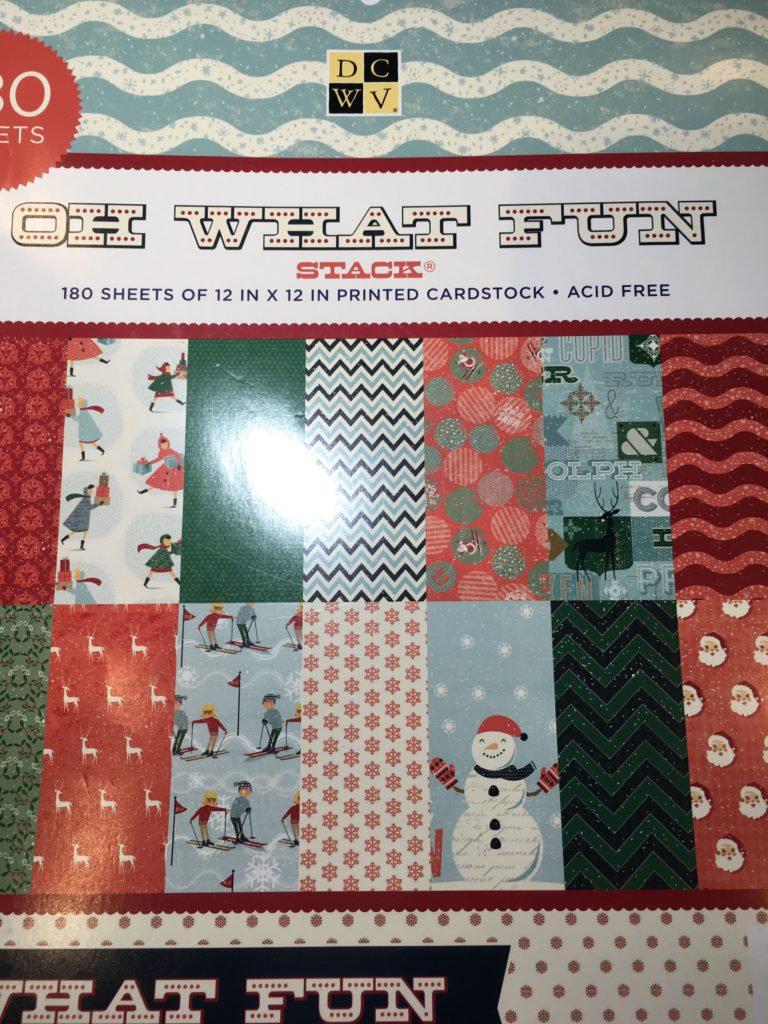
Last year one of my crafting angels (pig) bought a DCWV paper pad “Oh what fun” to make ornaments with me over one of our weekends together. We made several but at the end of the weekend she gifted me with the leftover paper as she is more of a jewelry maker and Fabric worker. I pulled it out this summer to try and get the jump on Christmas cards. I am more of a stamp and die cut person and work a lot on plain cardstock. I wanted to push my boundaries and try something new so I watched a lot of “use up a paper pad, and one sheet wonder” videos. I was looking for a way to use up my patterned paper quickly and efficiently. I am going to give a shout out to “Maymay Made It”. She has a fabulous tutorial video on using a pad of paper (or tutorials as I think there were two or three for the pad I watched). I watched other crafters that show the process sped up, it is entrancing to watch them work their magic. It reminds me of my kids when they watch each other play games on their X-Box. I ask them why is this entertaining to you, you are watching someone else play video games. Well now I understand. Back to MayMay, her video is excellent she explains how her brain functions for this process. She separates her papers and what she thinks she will use each for and talks about her step by step process through the entire pad. It really is fantastic so go find it on You Tube and give it a go. I would link it but really haven’t learned how to do that yet. I decided this would be my technique to try and use up a good portion of my paper quickly and efficiently. I wanted to create a lot of quick easy and efficient cute cards that I could sell at a craft show this fall.
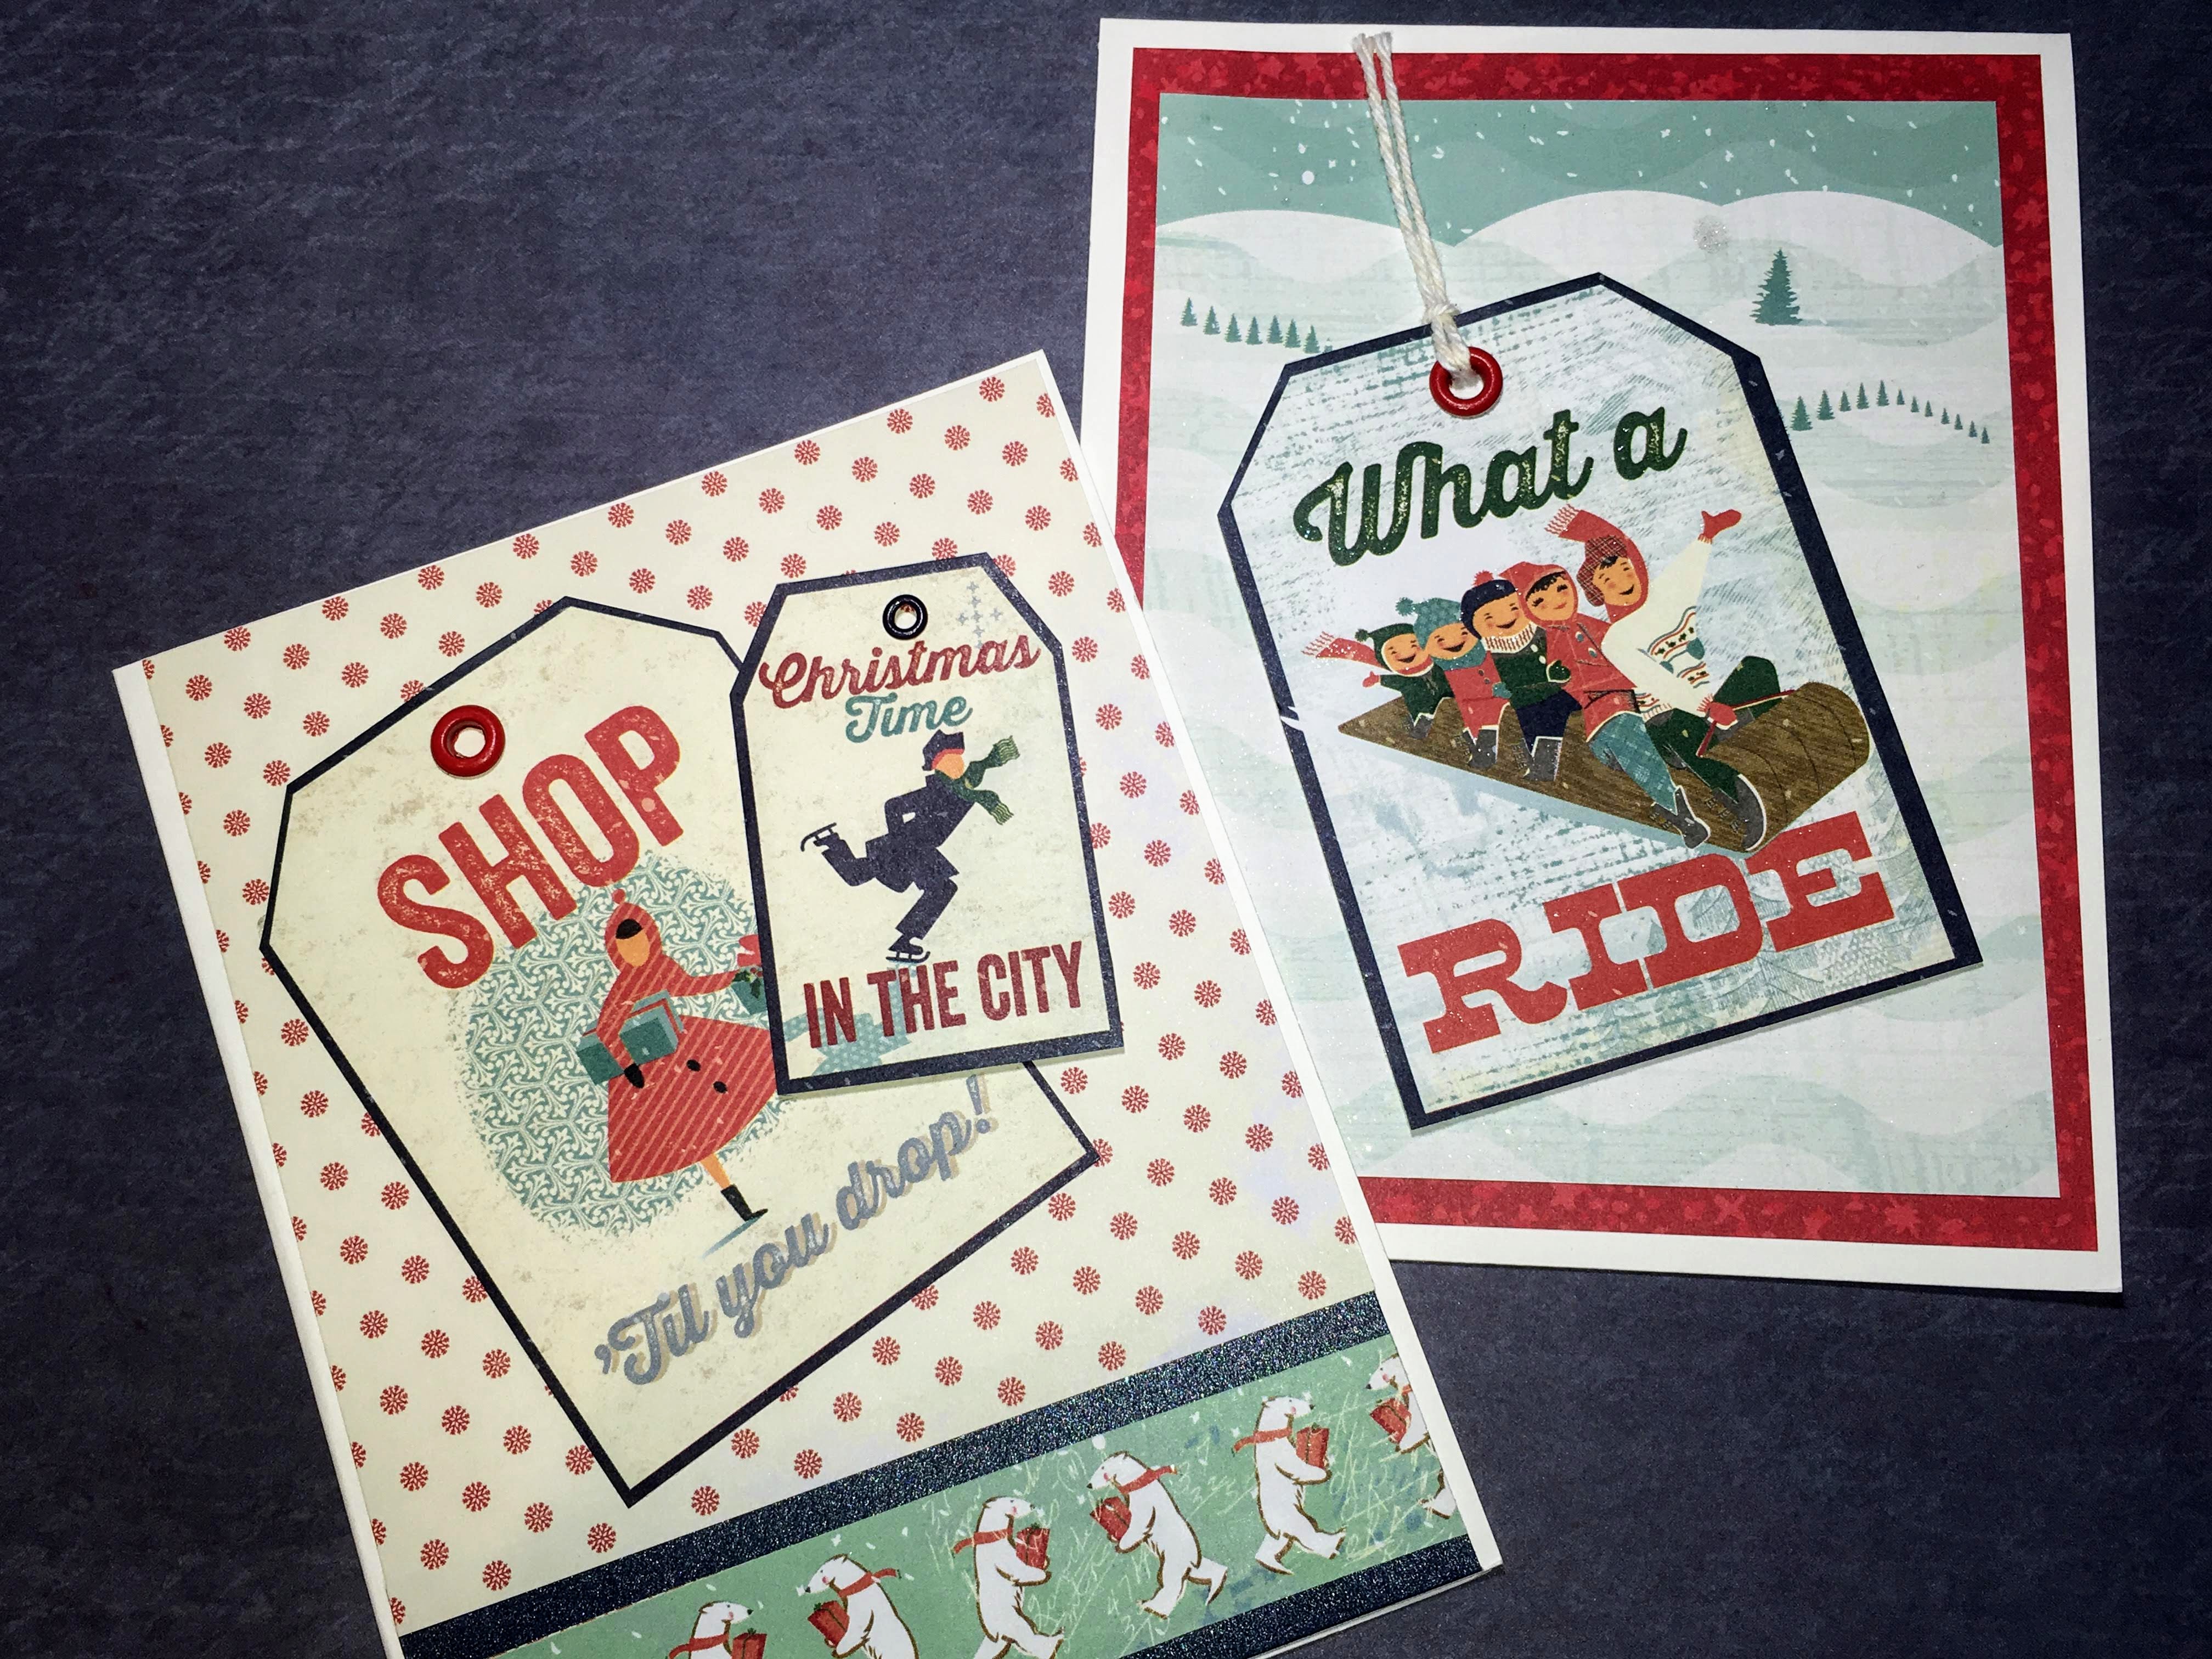
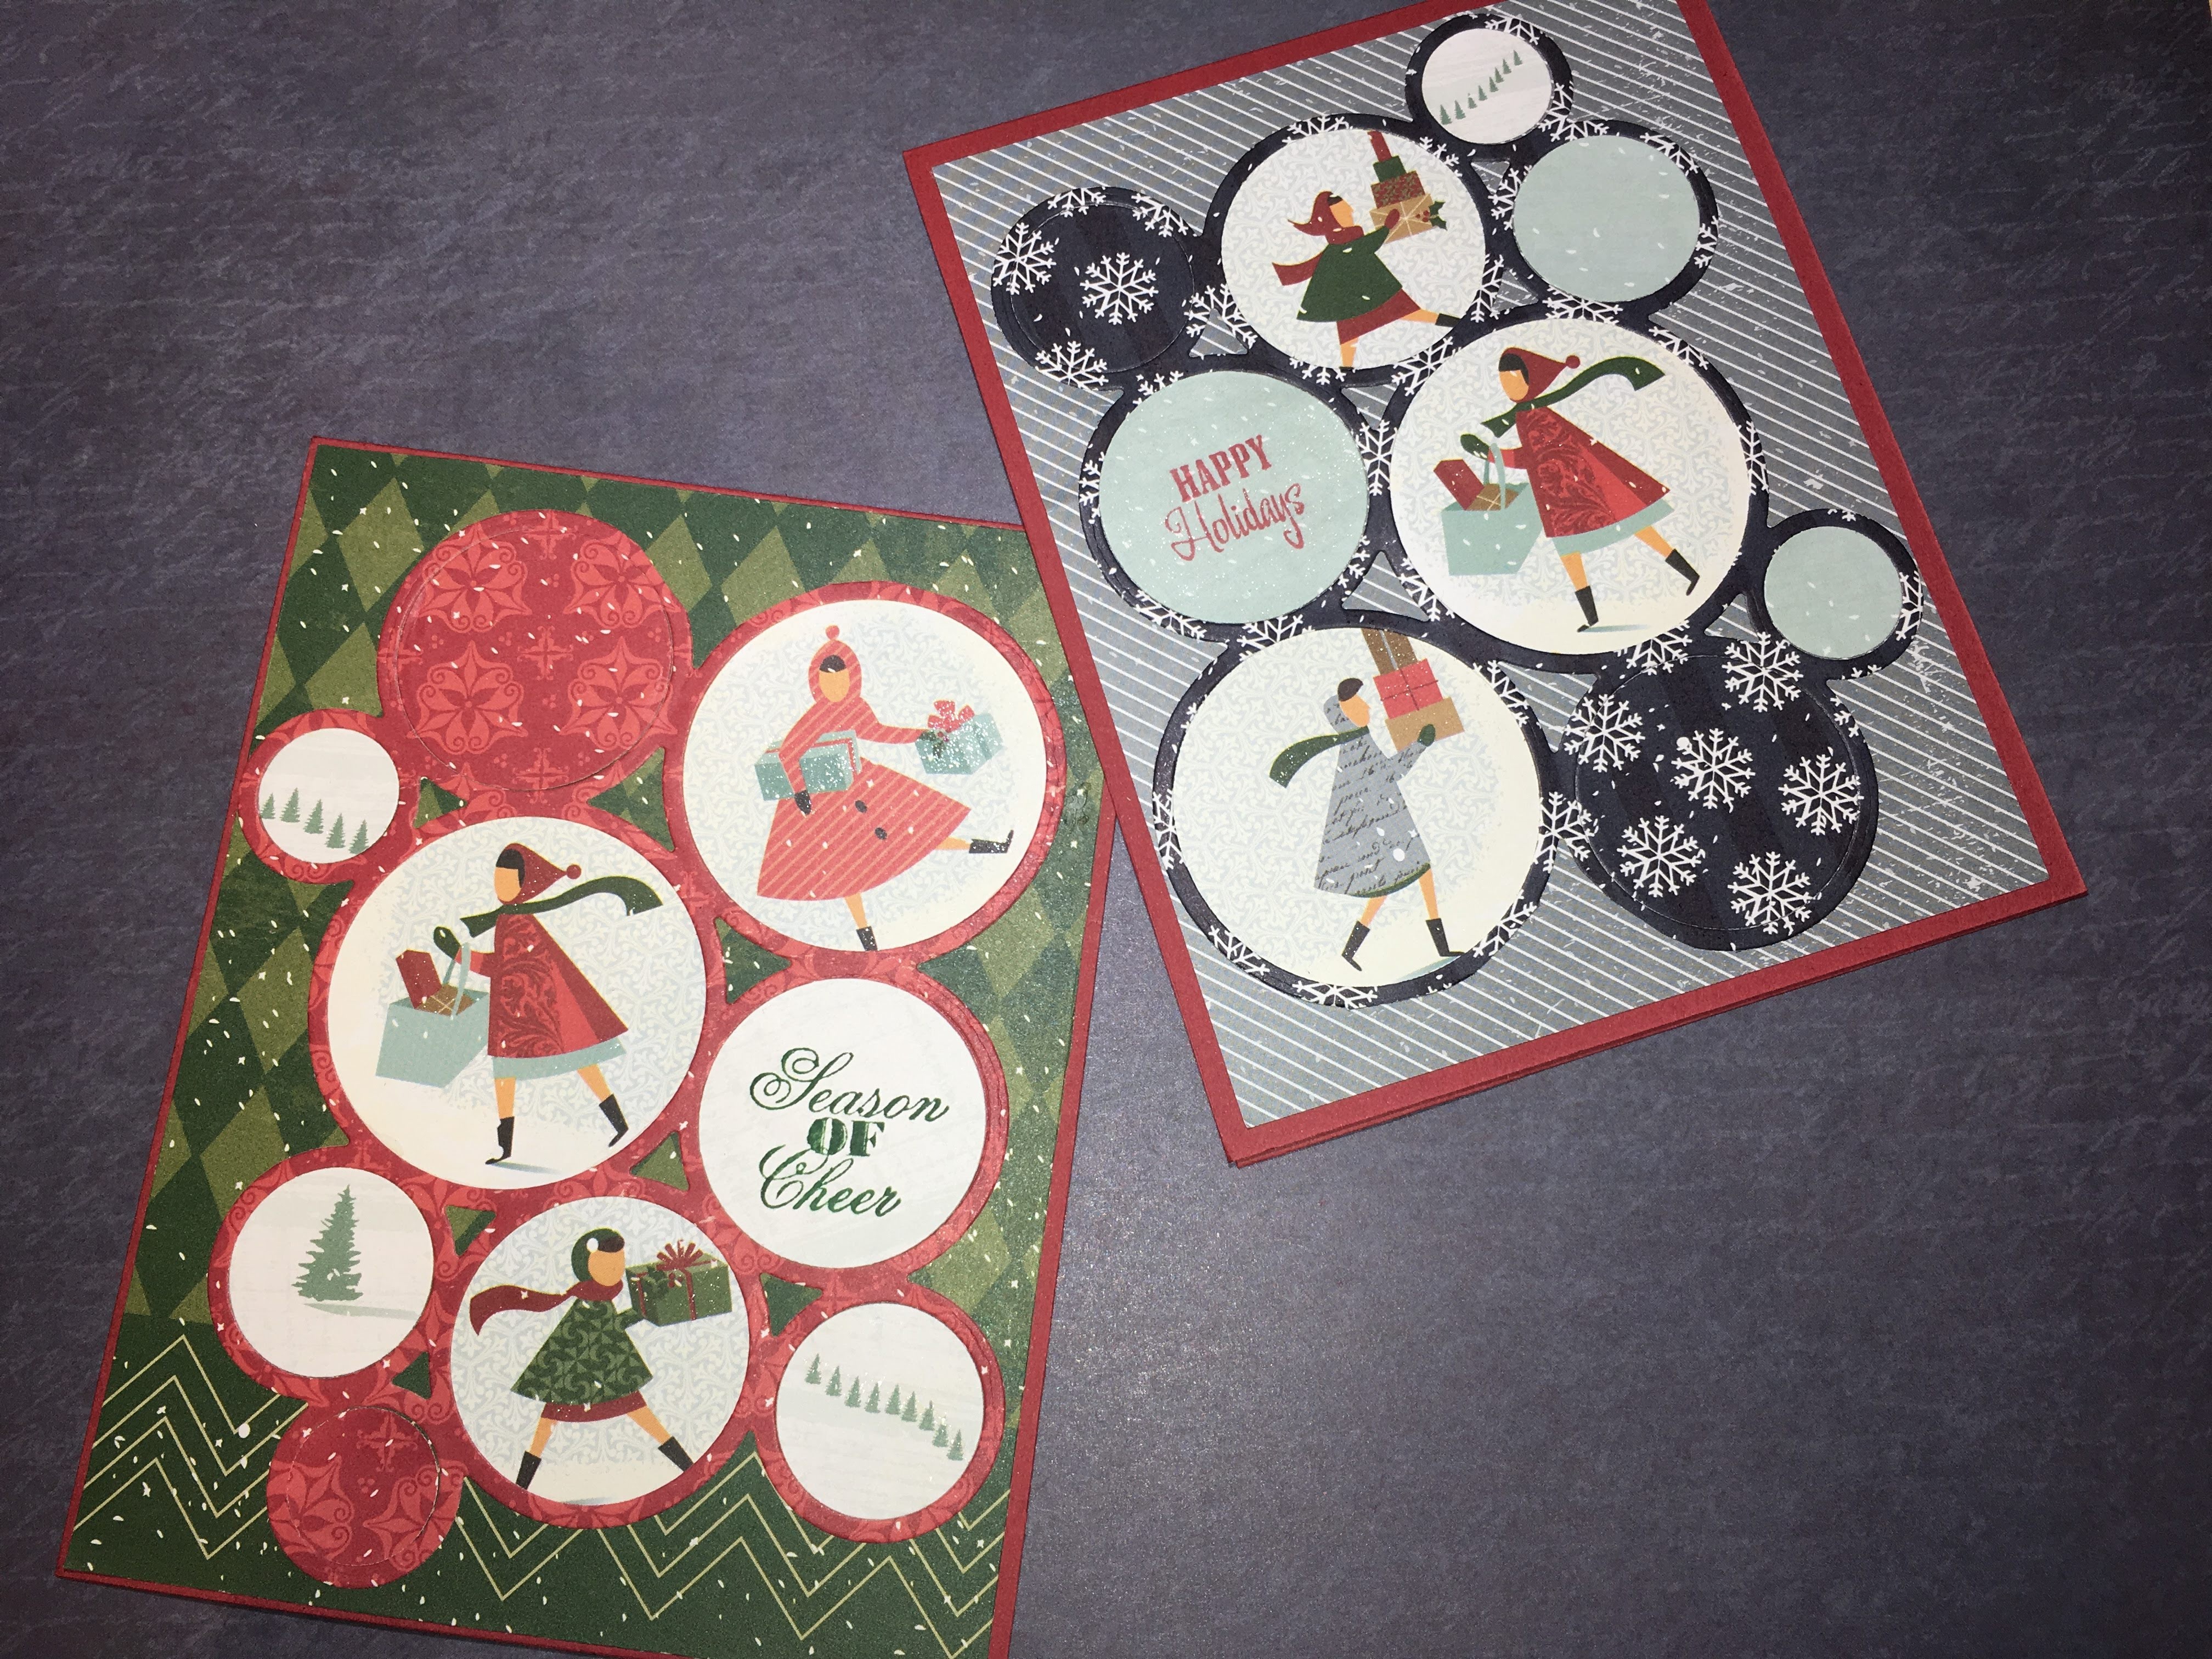
There were a couple of sheets that had images already outlined in a tag shape. I simply cut the tags out, added eyelets and bakers twine in some cases placed them on background papers and they were finished. All of these did get a littlespectrum noir sparkle pen to add sparkle and shine but the camera just didn’t pick it up. some of the tags have dimensional tape behind them to give the card a little more depth. The center card was a bit more challenging. I used a die from Spellbinders that gives you several connected circles. I cut out some of the vintage shoppers with a circle die to fit in the connected circles and inlaid the other circles with some contrasting paper. These took a little longer than I wanted as I was shooting for efficiency. Once I remembered to back my paper with double-sided tape before sending it through the Big Kick things got a lot easier. These also have some glitter pen accents.

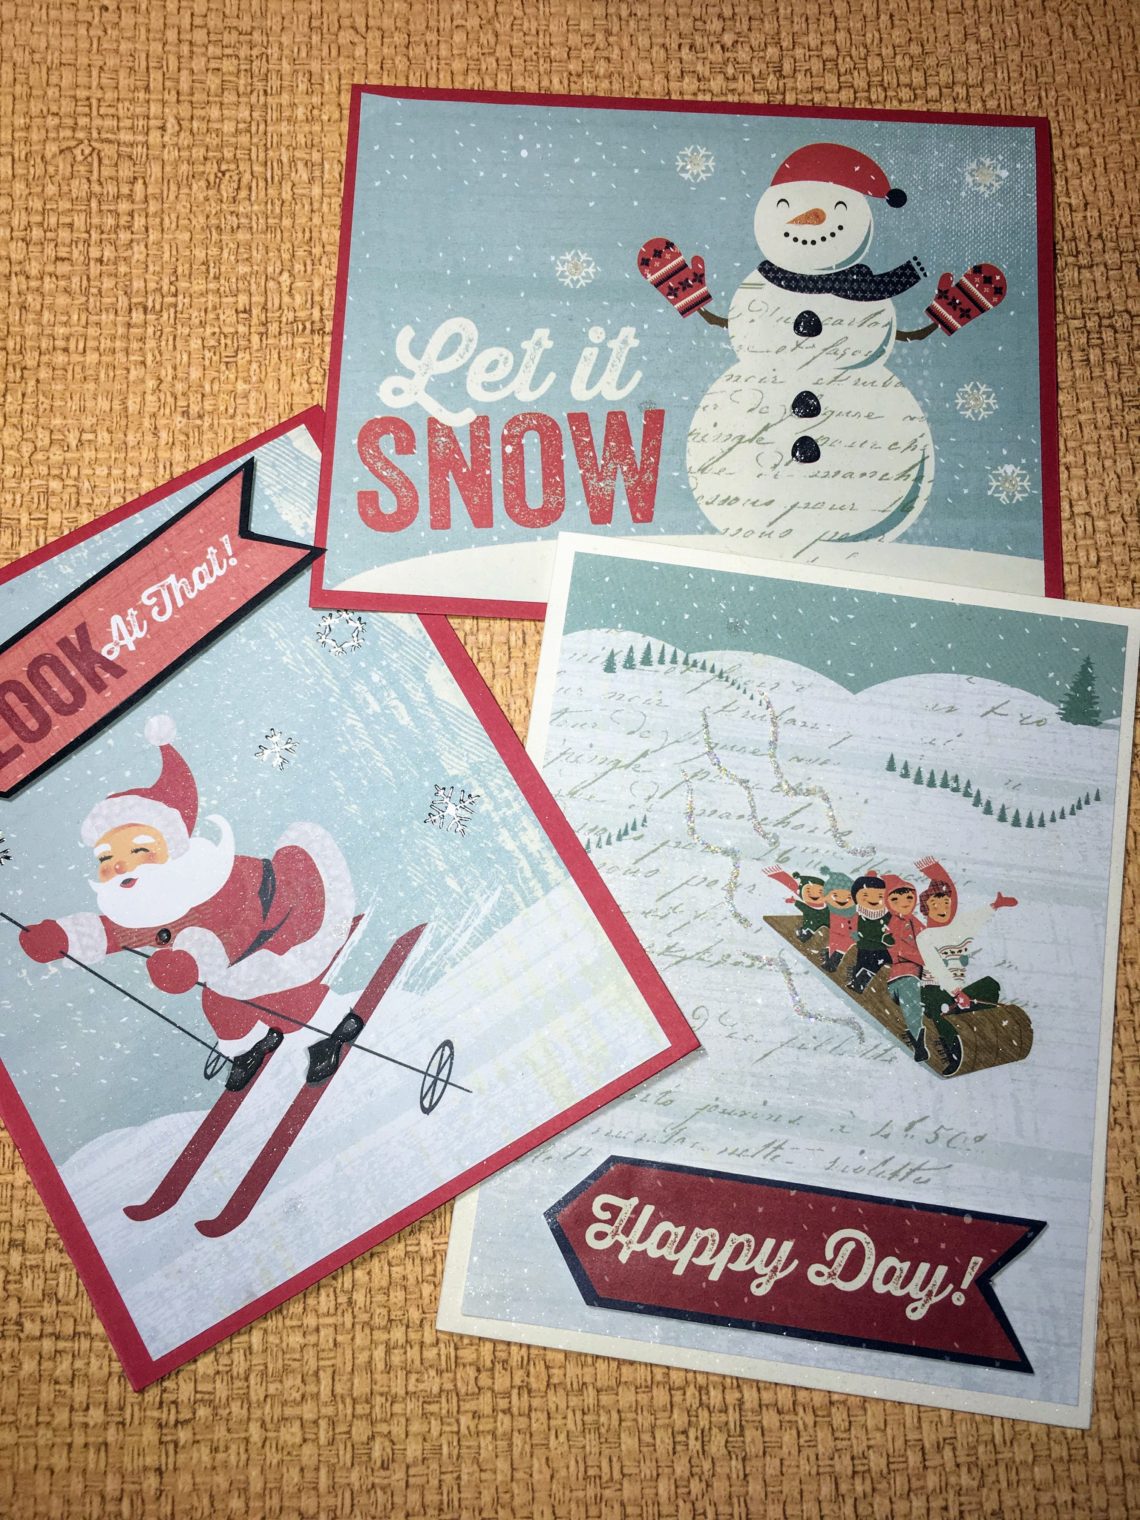
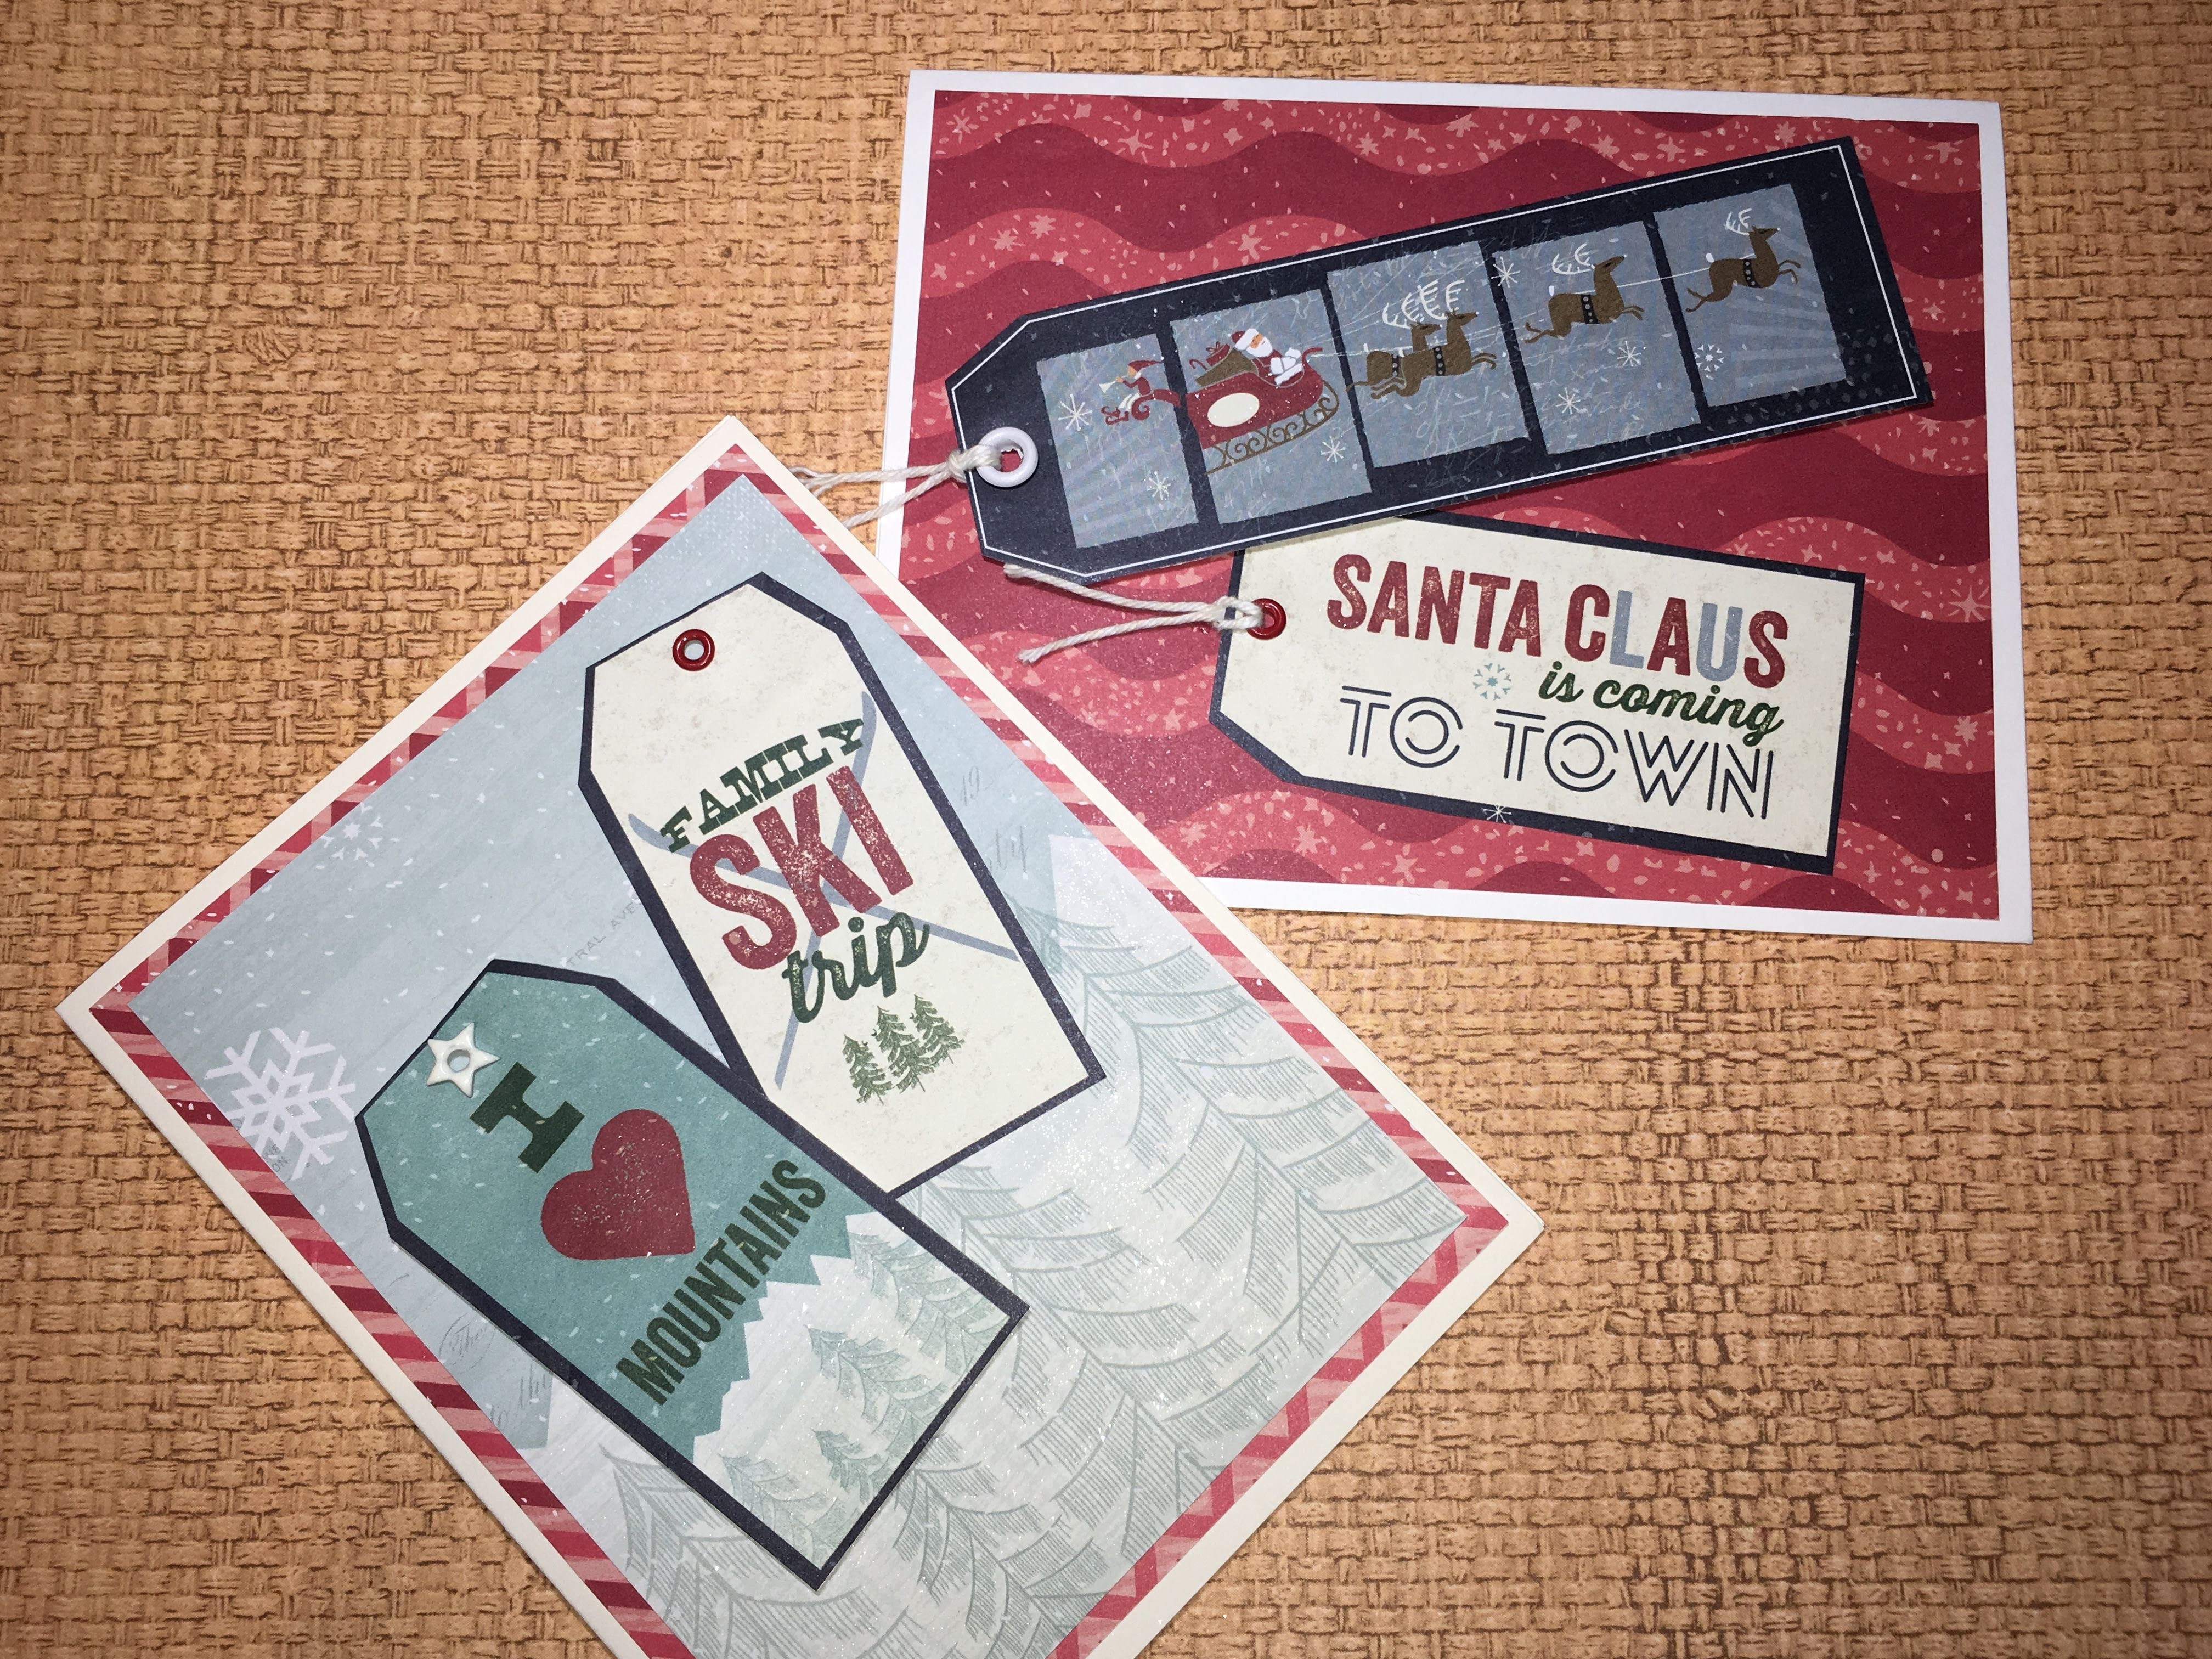
The three cards here are some of my favorite vintage images. They were also the easiest to put together. The paper had large focal images in a corner of the 12 x 12 sheet. I just figured out the best way to cut them to place the image where I wanted them to be, added a sentiment, glitter glue and some more spectrum noir sparkle pen to the snowflakes and these were done. There were a couple of repeat pages so I was able to get multiples of most of these cards.
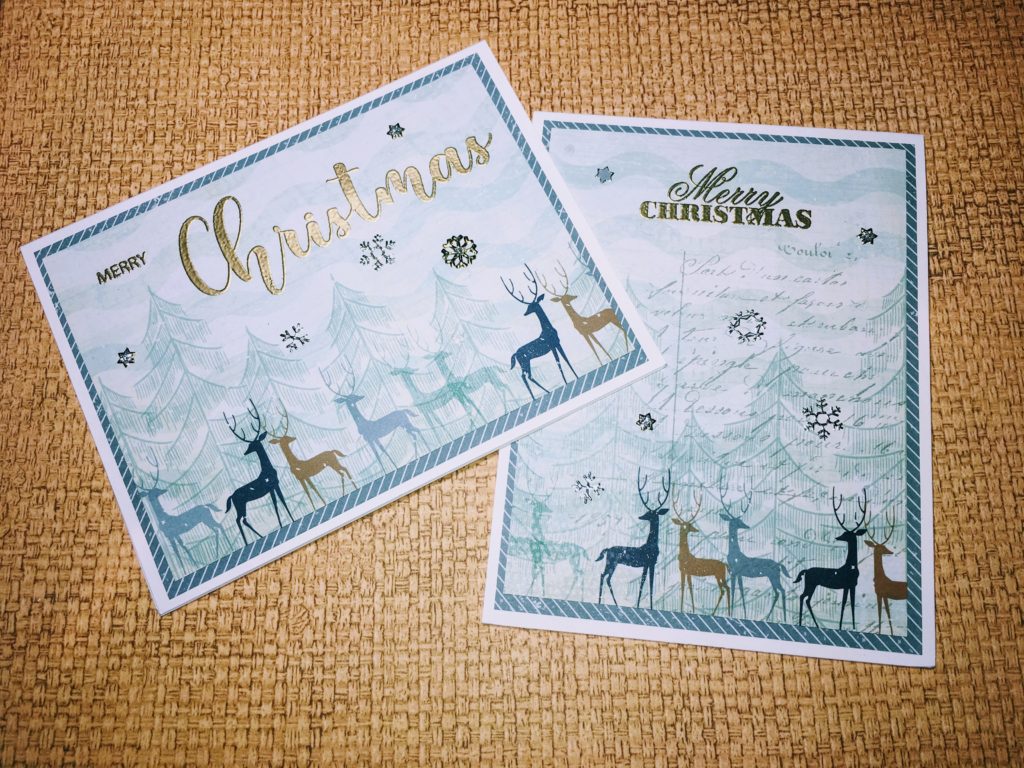

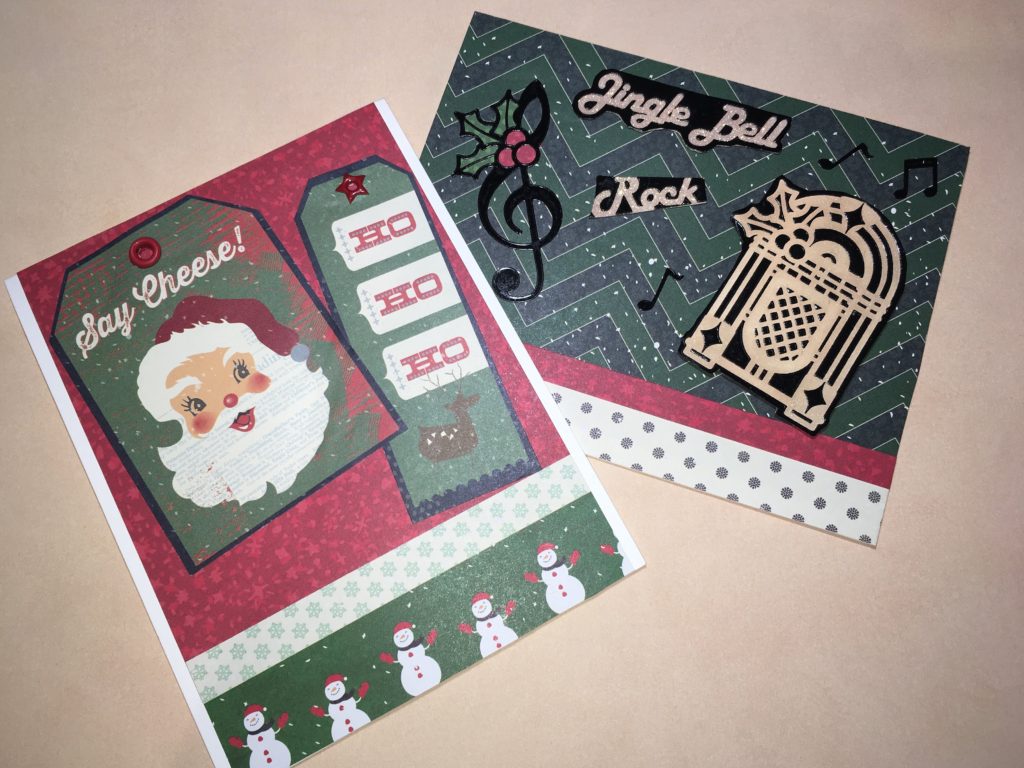
The picture above with the deer is also the same paper as my ski trip in the mountains card. The deer were on the bottom of the page but the trees continued across the entire page. Some strategic cutting and I was able to get some very different style cards from the same sheet of paper. This set of cards also has the added benefit of some “Dazzle” Stickers from “Hot Off the Press”. Snowflake dazzles with the deer add some sparkle and elegance along with gold embossing for the sentiment. The Dimensional ornaments are truly ingenious. Parts of the ornaments fold up from the card making the ornament leap out at you from the background. Last the Jukebox sticker really brings the vintage to my vintage style cards.
So I can hear everyone now… you got 15 cards out of a pad that had 180 sheets, where is the rest of the paper. Well most of these cards made 3-4 of each style and I only showcased 1 of each card I made. That being said we did use many sheets for ornaments last year and I shared some of the sheets with my crafting angel (pig) that does use paper. I learned one thing, there is a reason most of the “finish a pad” people use the 6 x 6 pads with 15-30 sheets in them. You will get tired of looking at the same paper after 50 cards! About half of my pad of paper is left and I plan on working through some more of the paper before the Christmas season but I am taking a break from this paper pad for now. The other lesson I learned is do not over think the process. I usually am a multi layer, lots of stamping, color those stamps, embellish to the moon kinda girl. Those kind of cards take a lot of time to create and I probably would not get what they are worth at a craft fair. I wanted ones I could sell as sets so that people could get their Christmas cards in one stop. The first few cards went really slow as I agonized over cutting the paper to the right size and placing my focal image. By the end of the day my mantra was it is only paper and I started cutting and trimming and layering with great energy. It was refreshing, energizing and I got a large stack of cards done. I will continue with this technique as I have several other pads of patterned paper that I have been hording in my crafting lair and it is time they saw the light of day. Please let me know if you have any questions or want to know more about any of the cards I showed you today. Thanks for stopping by.

Alcohol Markers First Trial