Ink blending
Hello again! I hope your August is going well. So this last week, I worked through another Altenew class, easy ink blending techniques. Here is my journey!
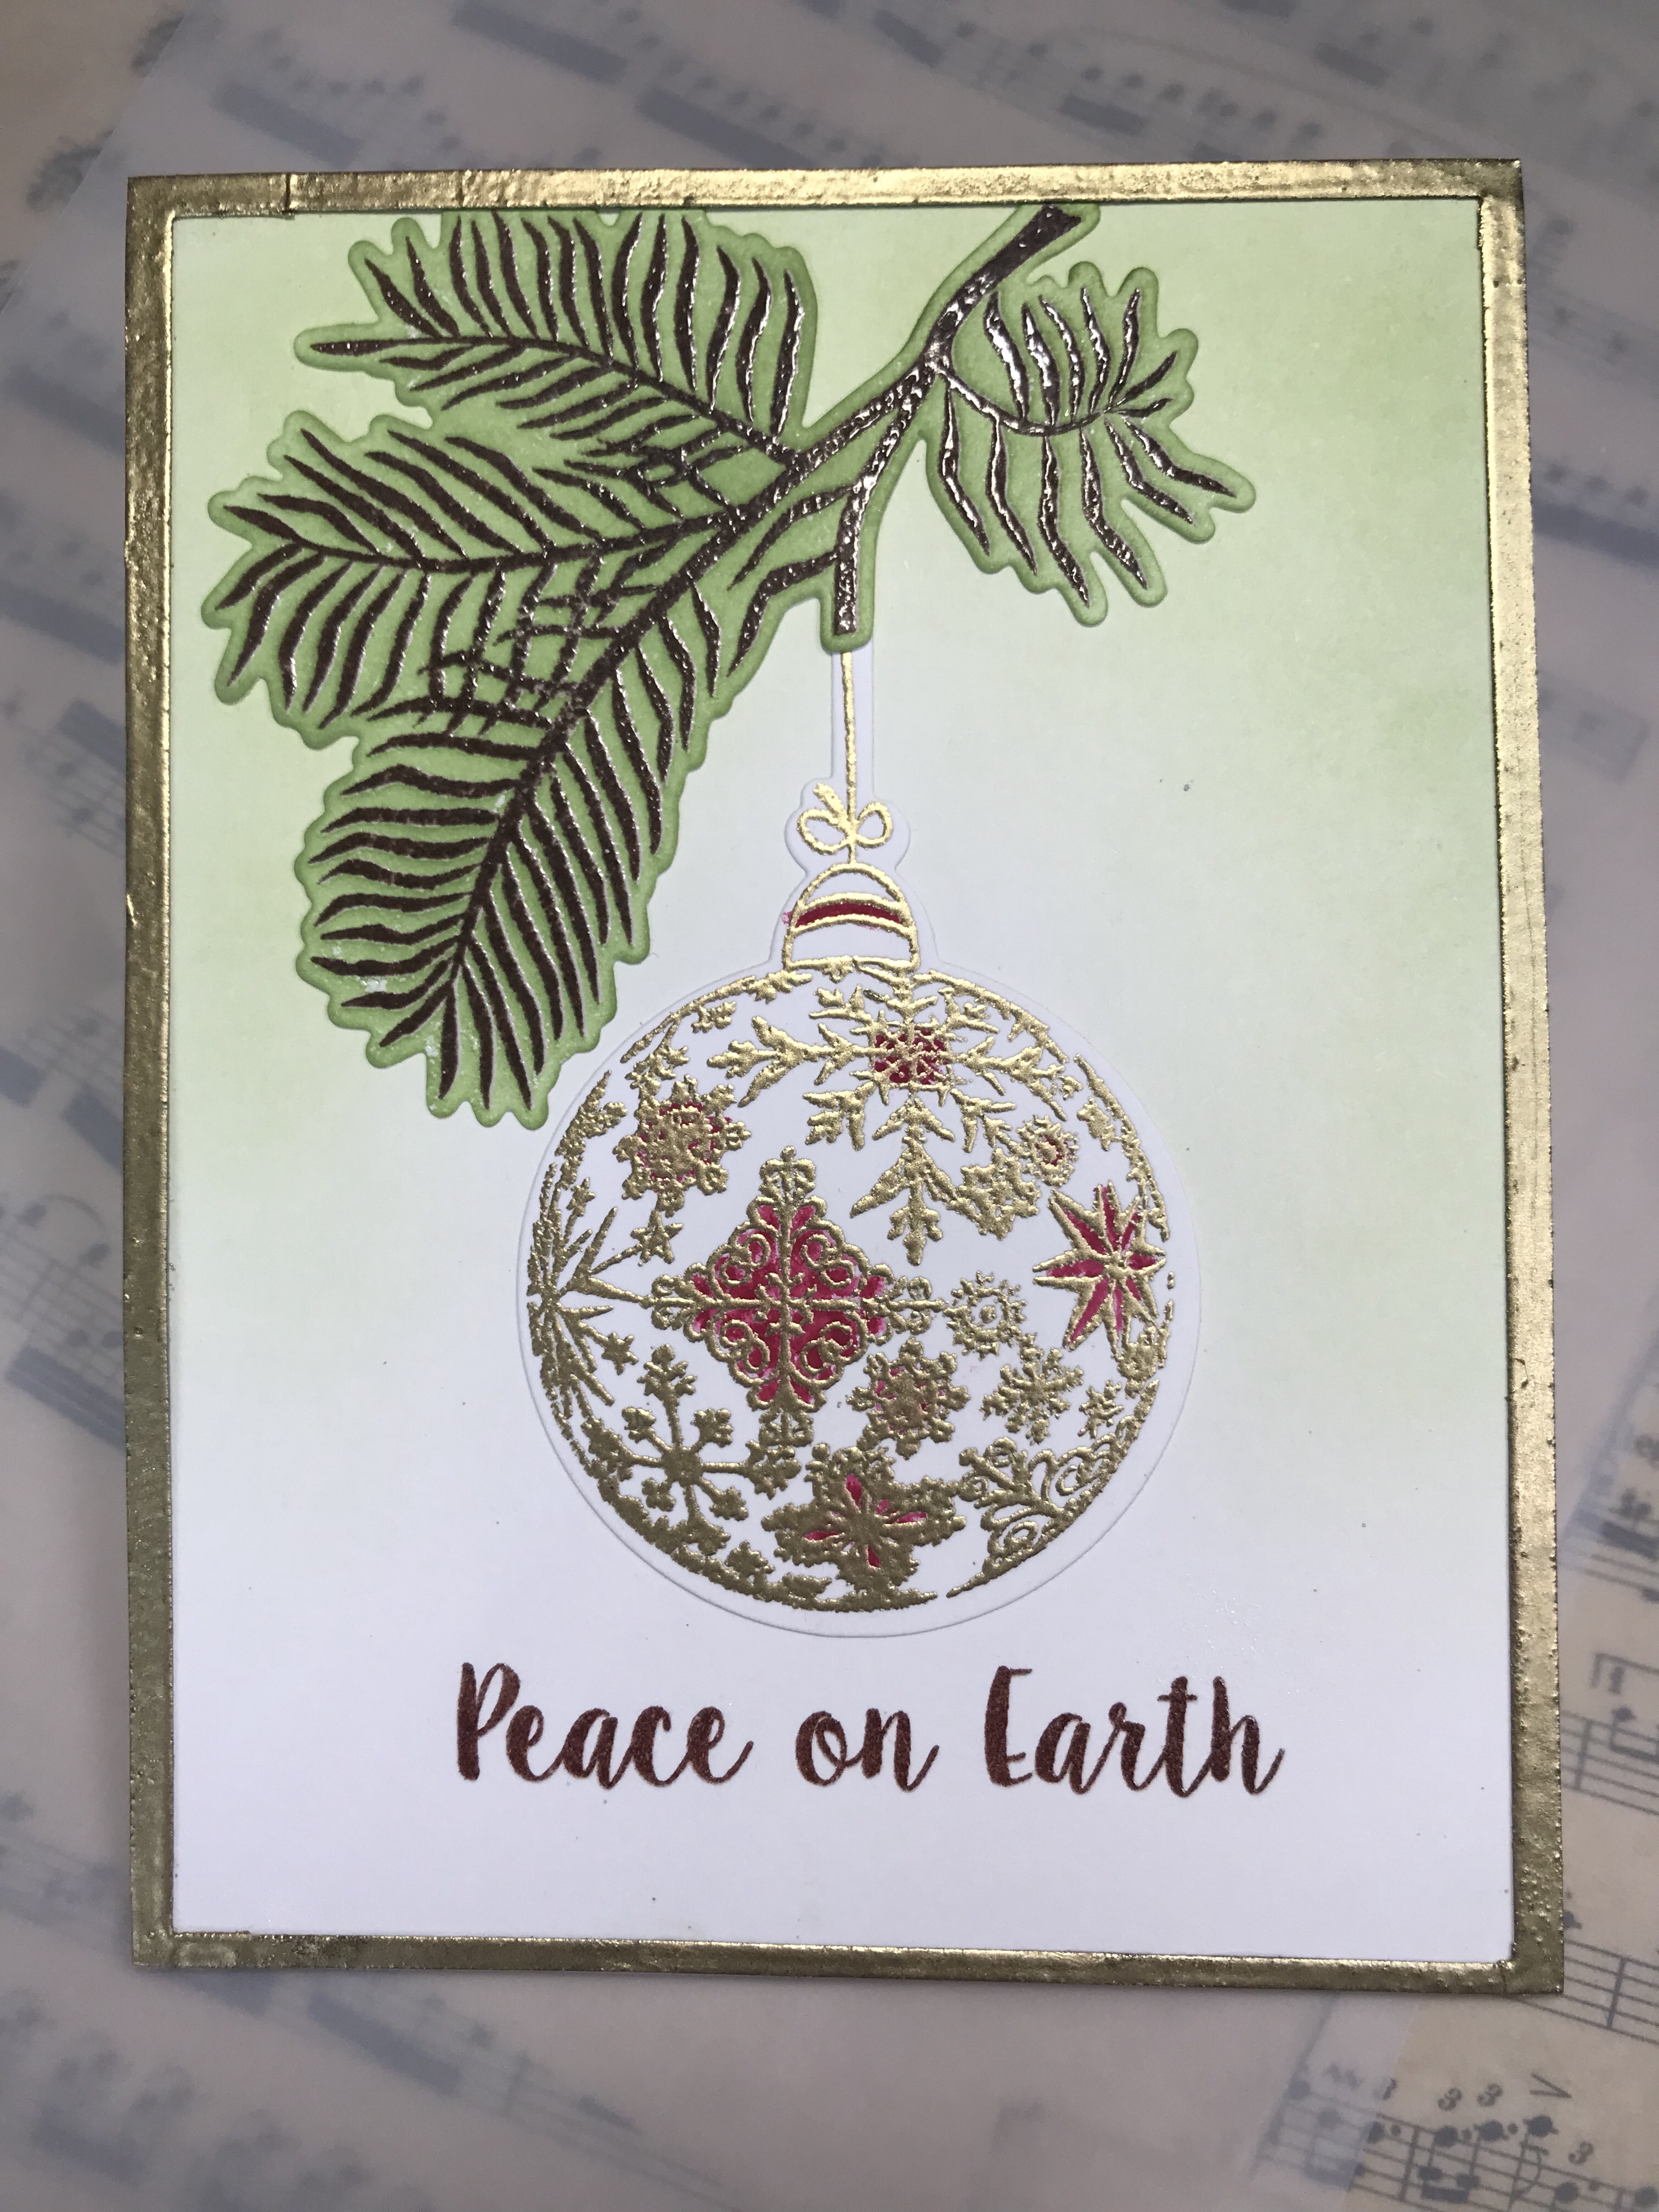
The first class was on creating a basic ink-blended background. This was fairly easy for me, as I have utilized this technique before. The instructor, Amy Lee, had some good tips that were great for me to hear again! I used Altenew’s Frayed Leaf and Forest Green to create a spotlight effect. I then turned to my Gina K Merry and Bright and Seasonal Sentiments stamp and die sets. I stamped the branch in cocoa Memento ink, then inked the branch in Forest Green. I stamped the ornament using Versamark ink and embossed it in gold embossing powder (Sparkle ‘n Sprinkle), and then colored in small sections using Altenew Rocket Red ink. I die cut both out and mounted them on the ink blended background. I stamped the sentiment “Peace on Earth” from the Honey Bee Stamps collection, Joy to the World using Memento Brilliance Cosmic Copper ink, then coated it with clear embossing powder (Sparkle ‘n Sprinkle) to give it some shine. I finished the card off with a gold embossed frame.
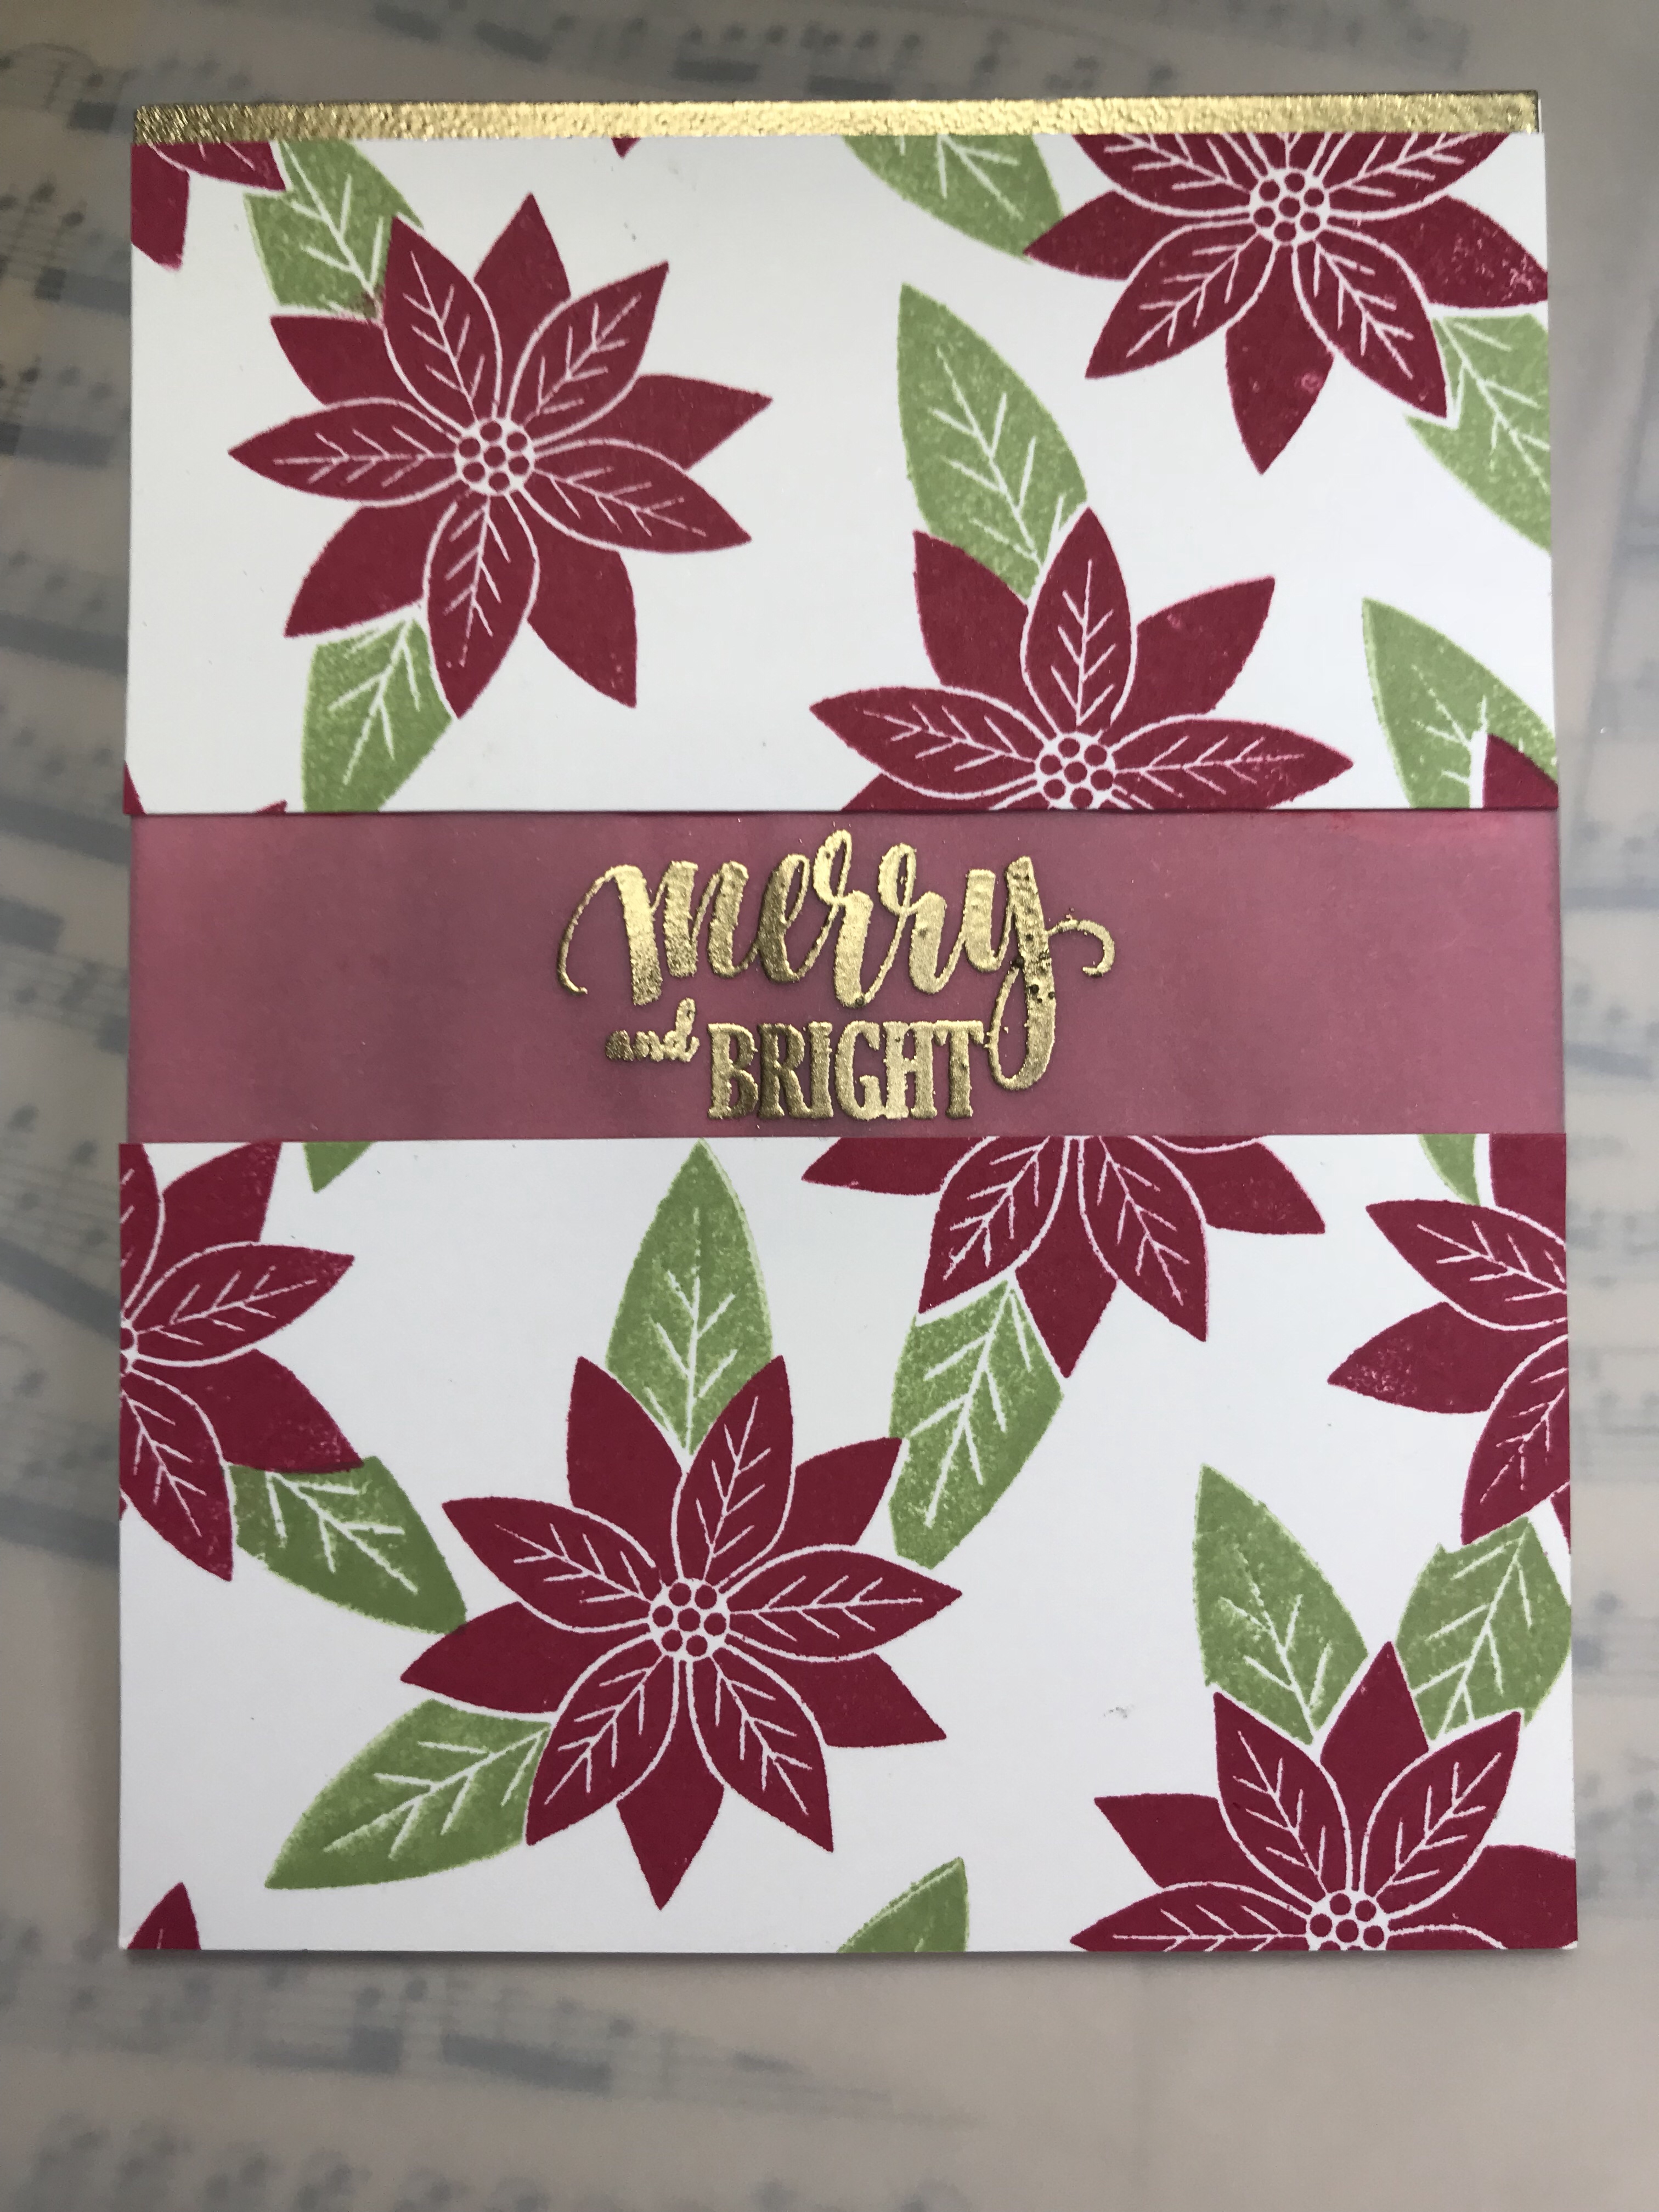
The second class was to ink blend card stock. Using Gina K’s Merry and Bright stamp set again, I repeatedly stamped poinsettias and leaves in Altenew Rocket Red and Frayed Leaf inks. I then cut the background in half, and ink blended a piece of card stock in Rocket Red. Initially, I was just going to mount the poinsettia background over the blended background. But, I wasn’t thrilled with how that looked. So I decided to use gold embossing powder to stamp the sentiment “Merry and Bright” on vellum. To soften the Rocket Red, I placed the vellum sentiment over the blended card stock. I added a gold embossed strip at the top edge of the blended background, then attached the poinsettia background.
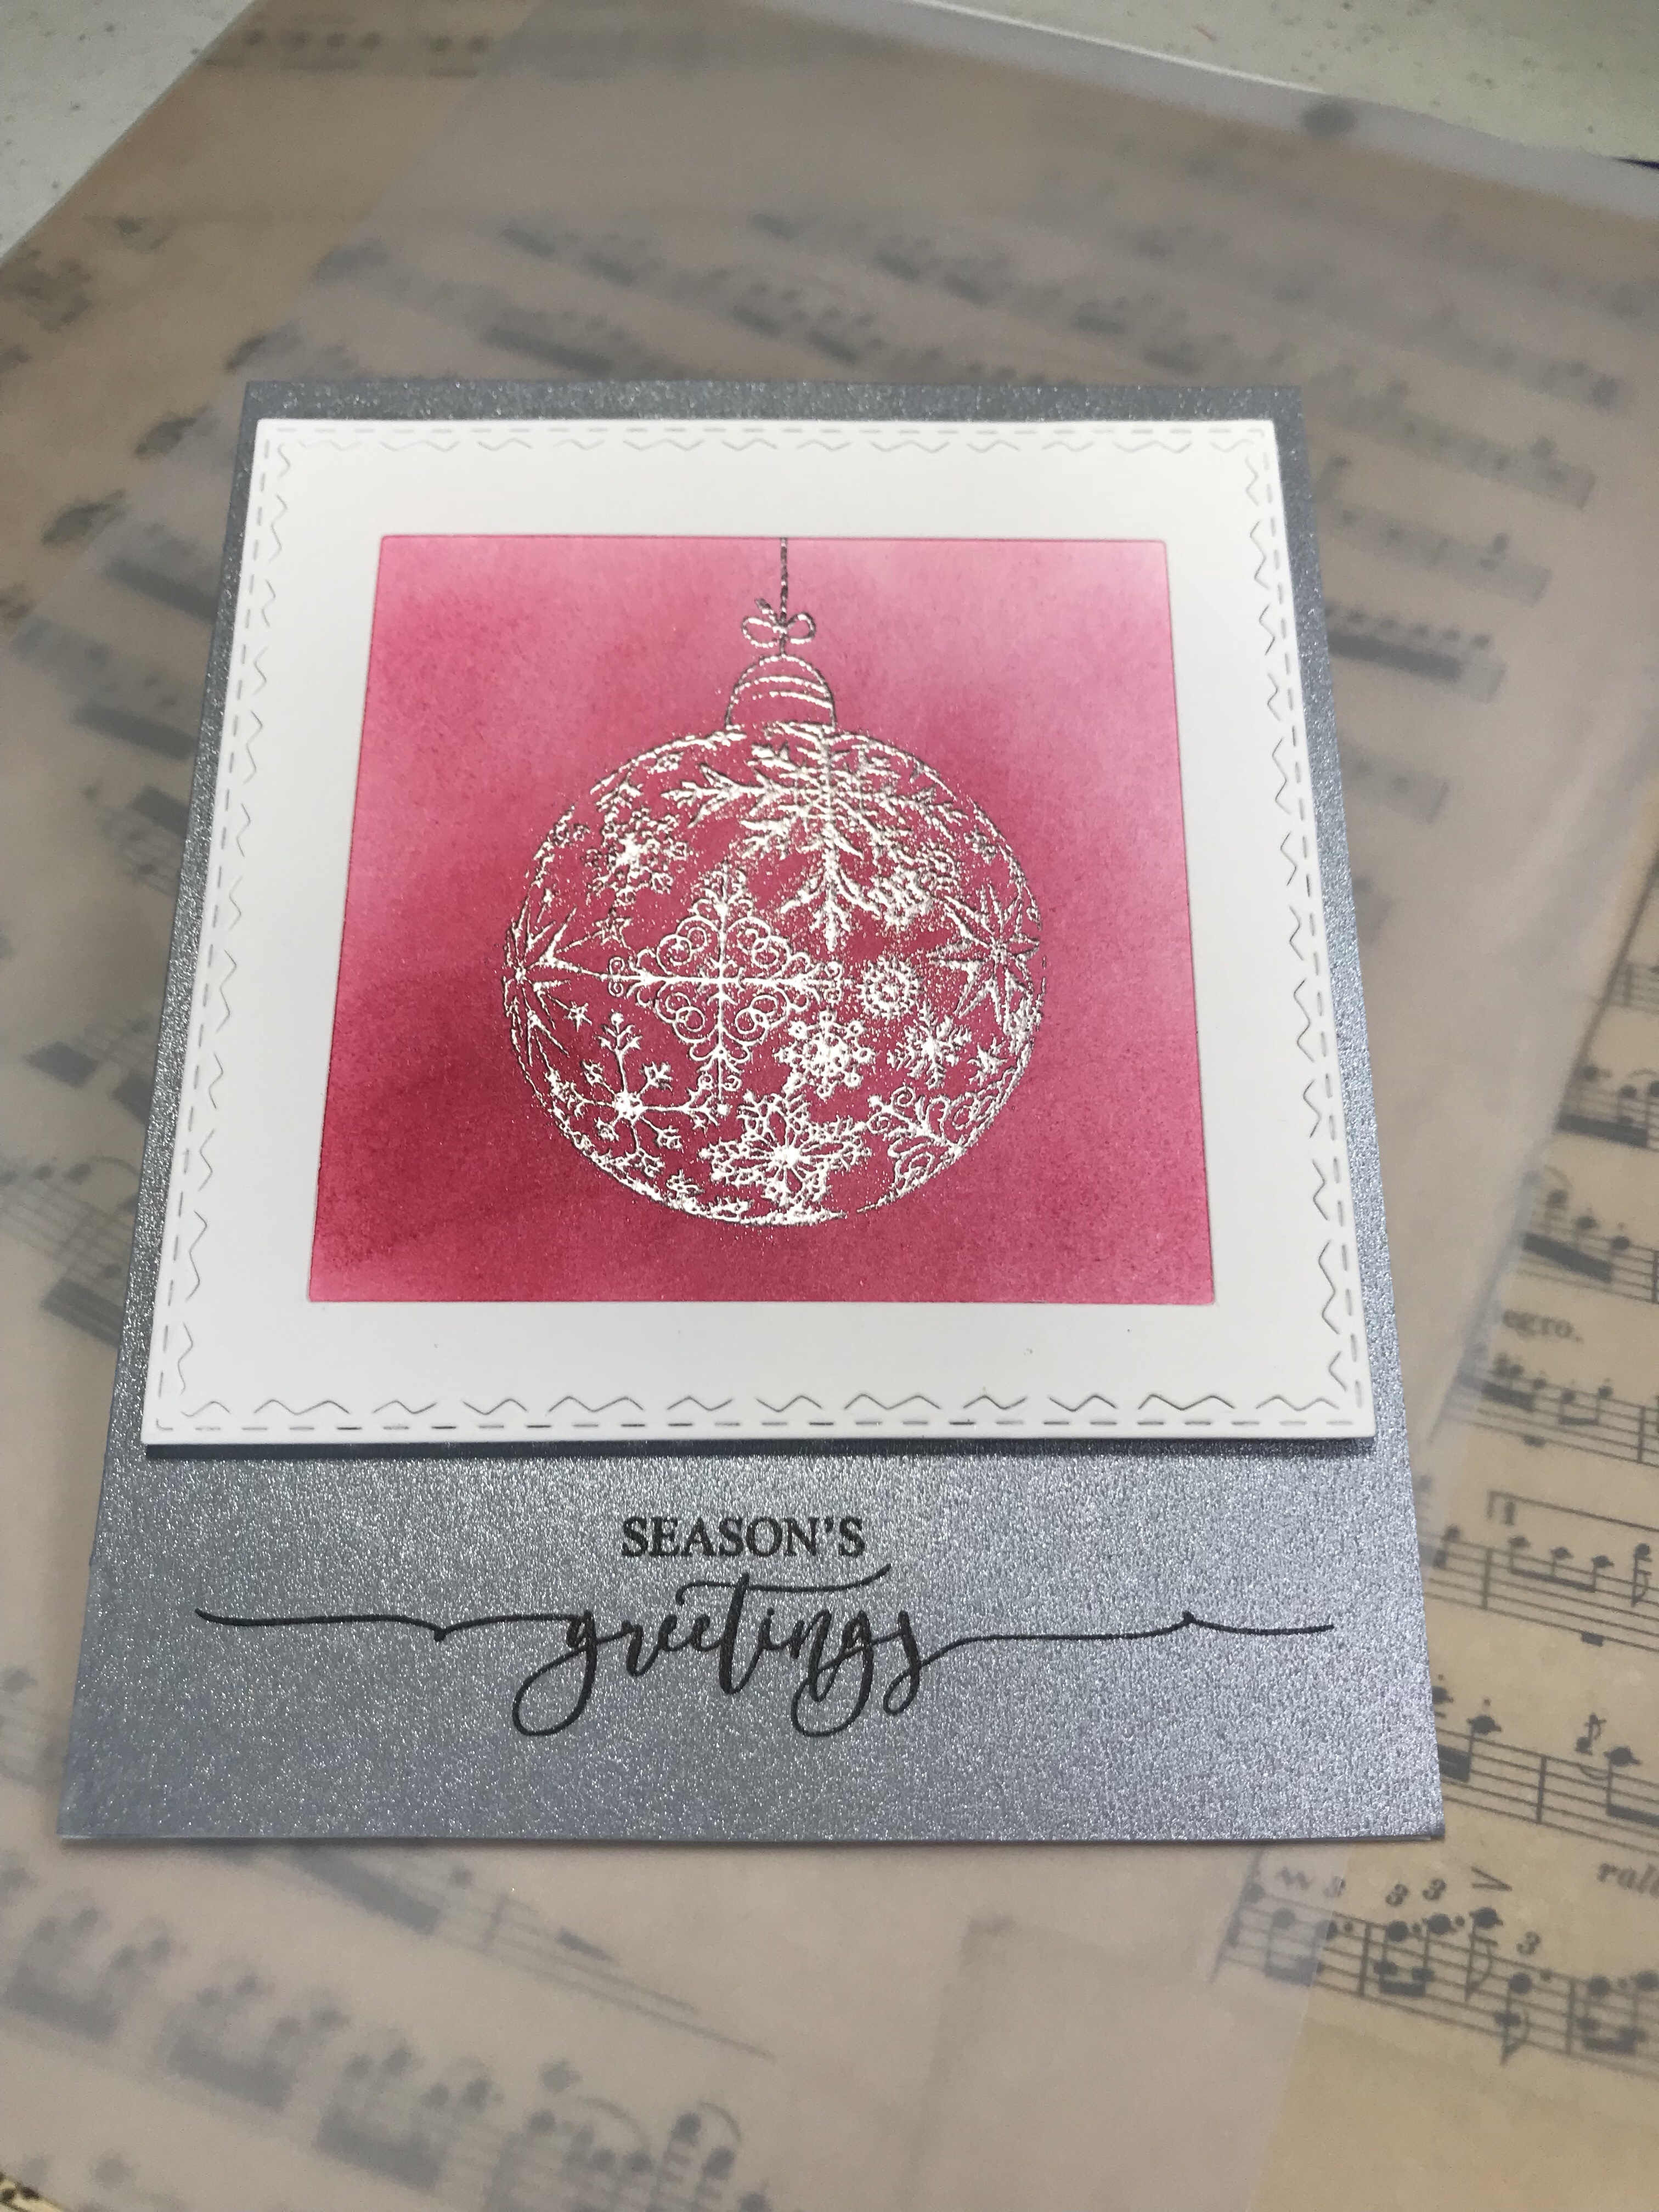
Next up was Adding Detail to ink blending. I used two colors of distress inks, Festive Berries and Worn Lipstick, to create a more intense ombré effect. I then embossed the ornament from Gina K’s Merry and Bright in silver embossing powder (Sparkle ‘n Sprinkle). I die cut a frame using Tim Holtz Alterations framelits stitched square dies, then cut down the blended ornament to fit the square frame, attaching it to the frame and then backing it with craft foam. I used Gina K’s Scripty Holiday set to stamp “Season’s Greetings” in her black amalgam ink on silver shimmer paper from my stash. I attached the framed ornament on the silver paper, then attached the entire background to a card base. I love the simplicity of this card.
The next class focused on Emboss Resist, a technique which I have used frequently in the past. I turned to one of my favorite background stamps, a flourish background made by Impression Obsession. I embossed this in white embossing powder (Sparkle ‘n Sprinkle). I then inked it using cracked pistachio and pine needle distress inks, again creating an ombré effect. I turned to Gina K again, Seasonal Sentiments, both the stamp and die set. I embossed several pine cones in gold (Sparkle ‘n Sprinkle), die cut them out, then inked the pine cones with Frayed Burlap. I embossed the sentiment “Wishing you a Merry Christmas” in gold to match, and cut out the word Christmas using the matching die. I inked “Christmas” using cracked pistachio, the. Die cut out several more, leaving them white. I stacked the three sentiments on top of each other, adhering each layer using Stay Put adhesive from Simply Refined. I attached the sentiment to the ink blended background, and then mounted it on a white card base.

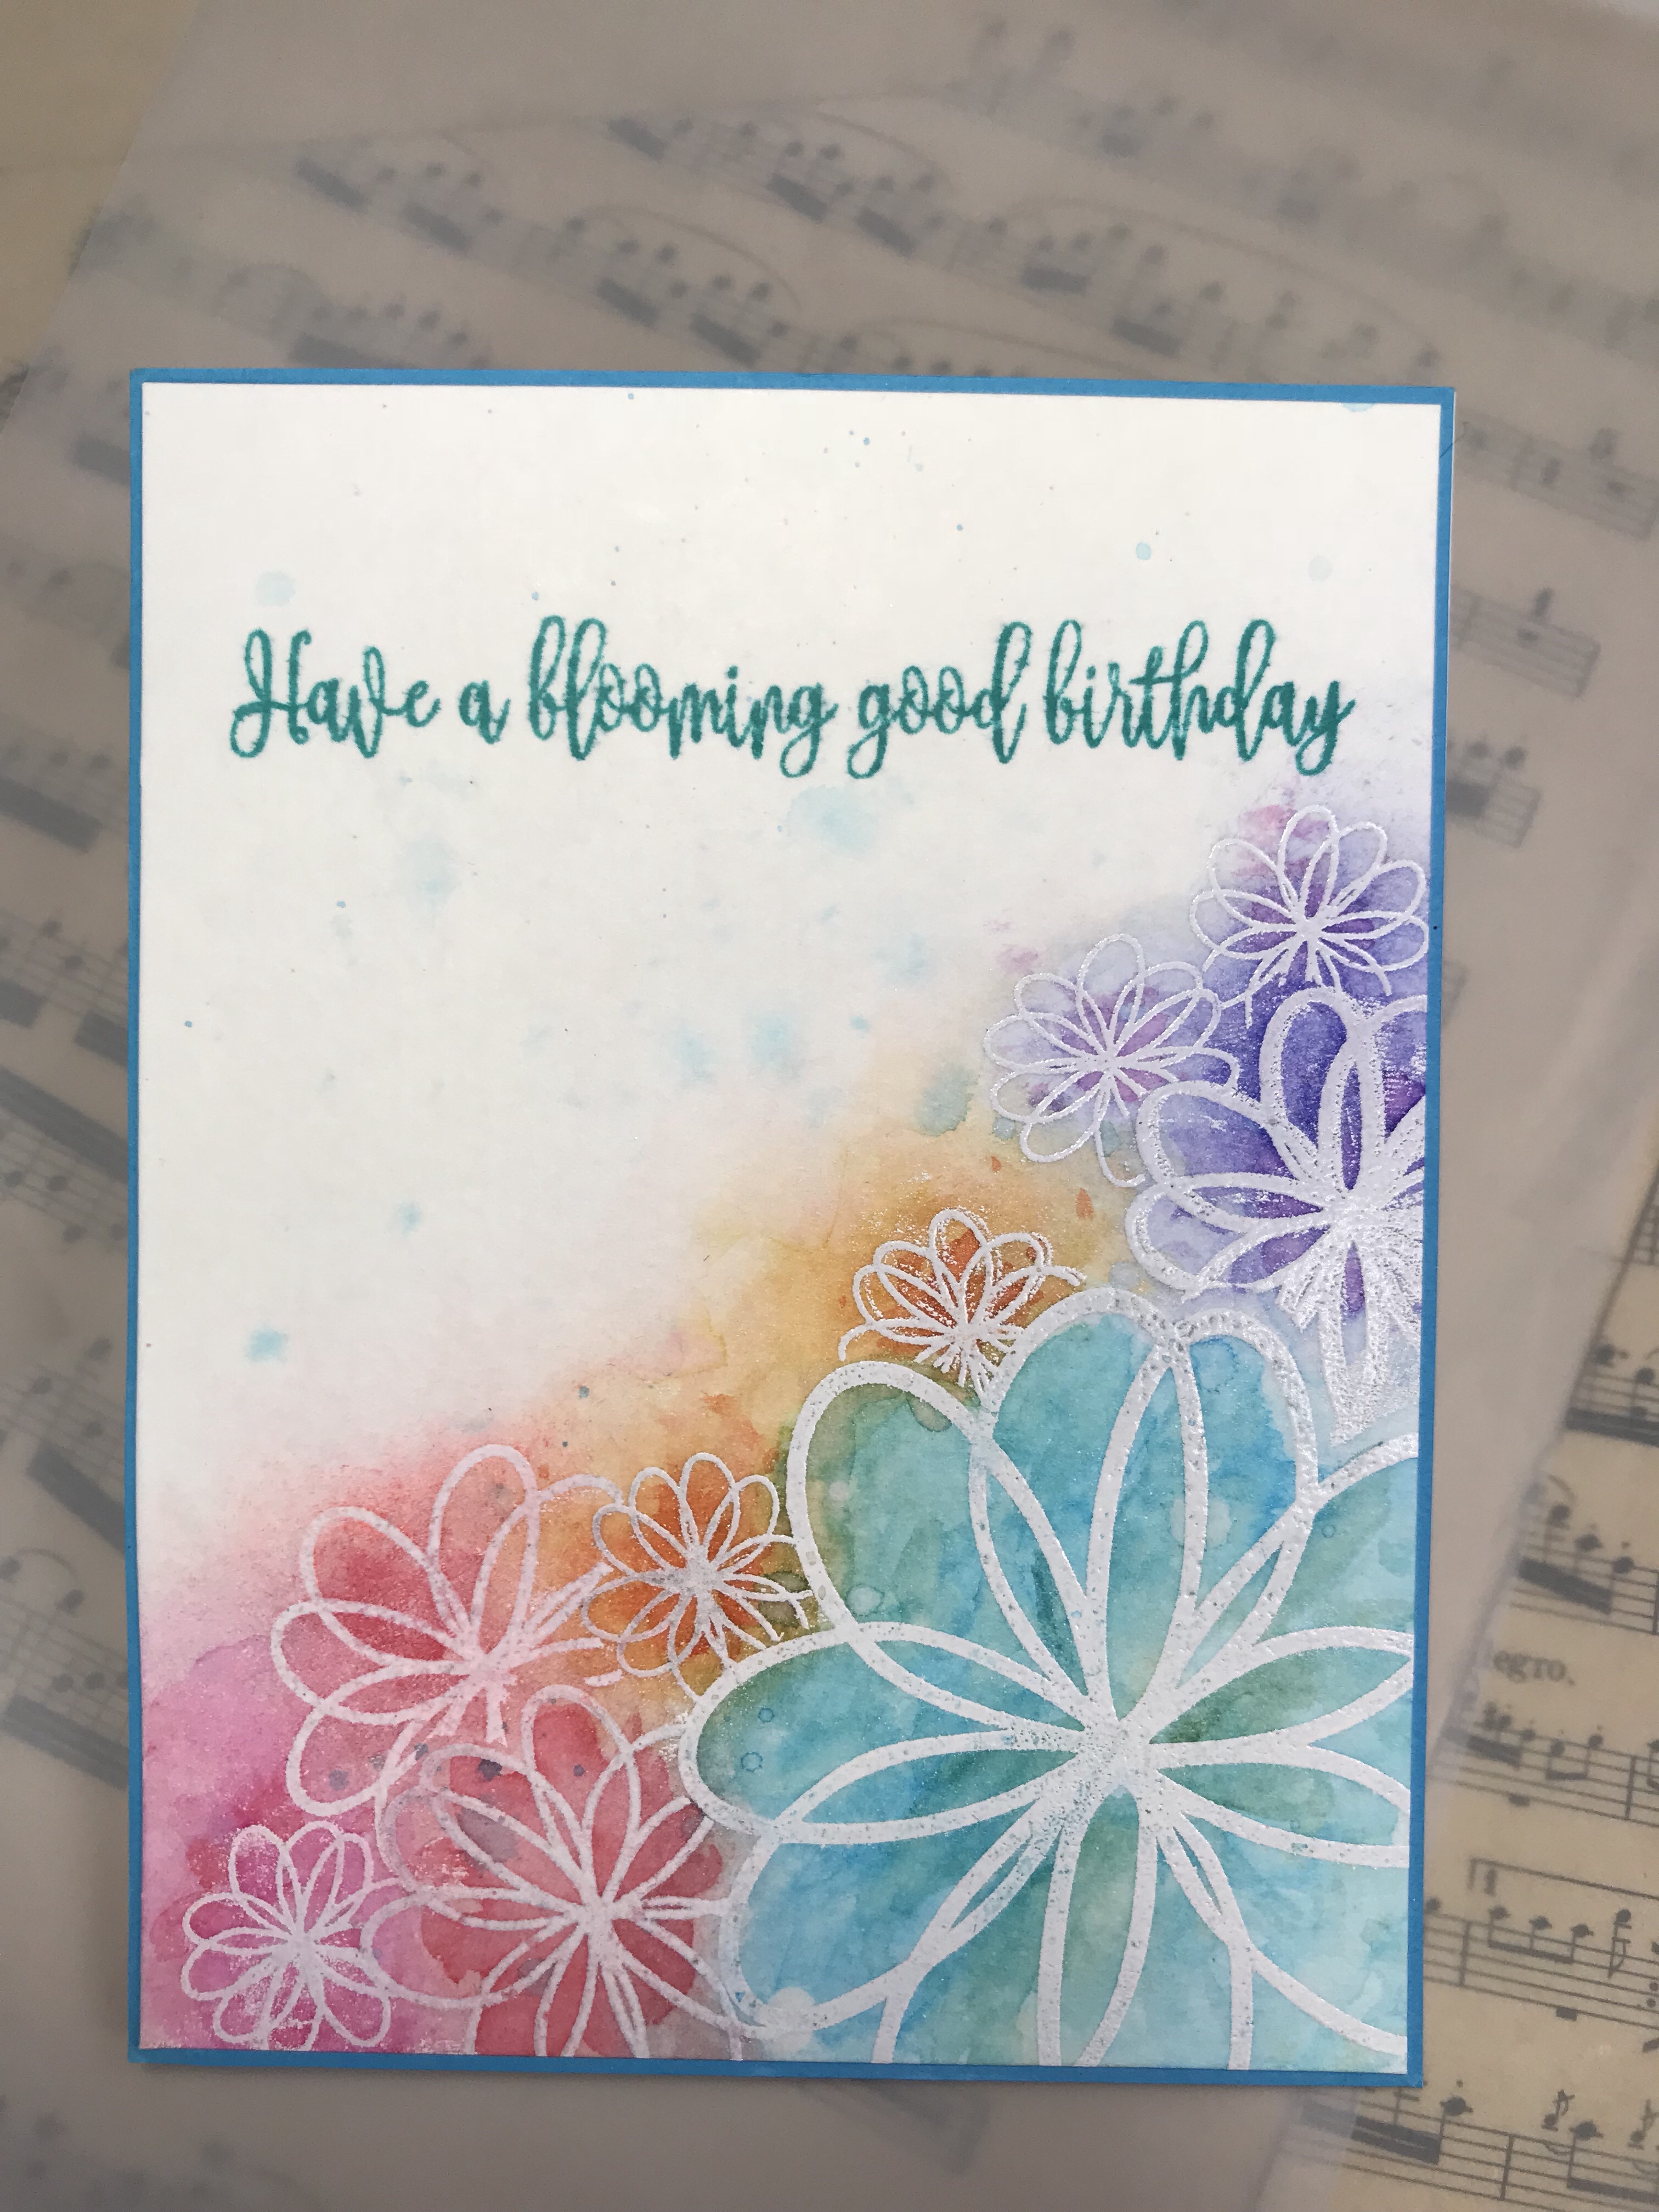
The fifth class was the most challenging for me, faux watercolor. I used the Sizzix Doodle Flower stamp set and embossed several images in white (Sparkle ‘n Sprinkle). I then used several colors from Gina K’s inks: turquoise sea, wild wisteria, passionate pink and sweet mango. I used those colors to ink blend the flowers, the added a little water to soften the images. Following the instructor’s lead, I used distress ink in shades that are similar, but a little darker than the Gina K inks. Mermaid lagoon, worn lipstick, seedless preserves and abandoned coral. I used mermaid lagoon to lightly spatter the background, and stamped the sentiment “Have a Blooming Good Birthday” (Gina K, A Wealth Of Wishes) in Turquoise sea ink. I attached the water colored background to a piece of turquoise card stock from my stash.
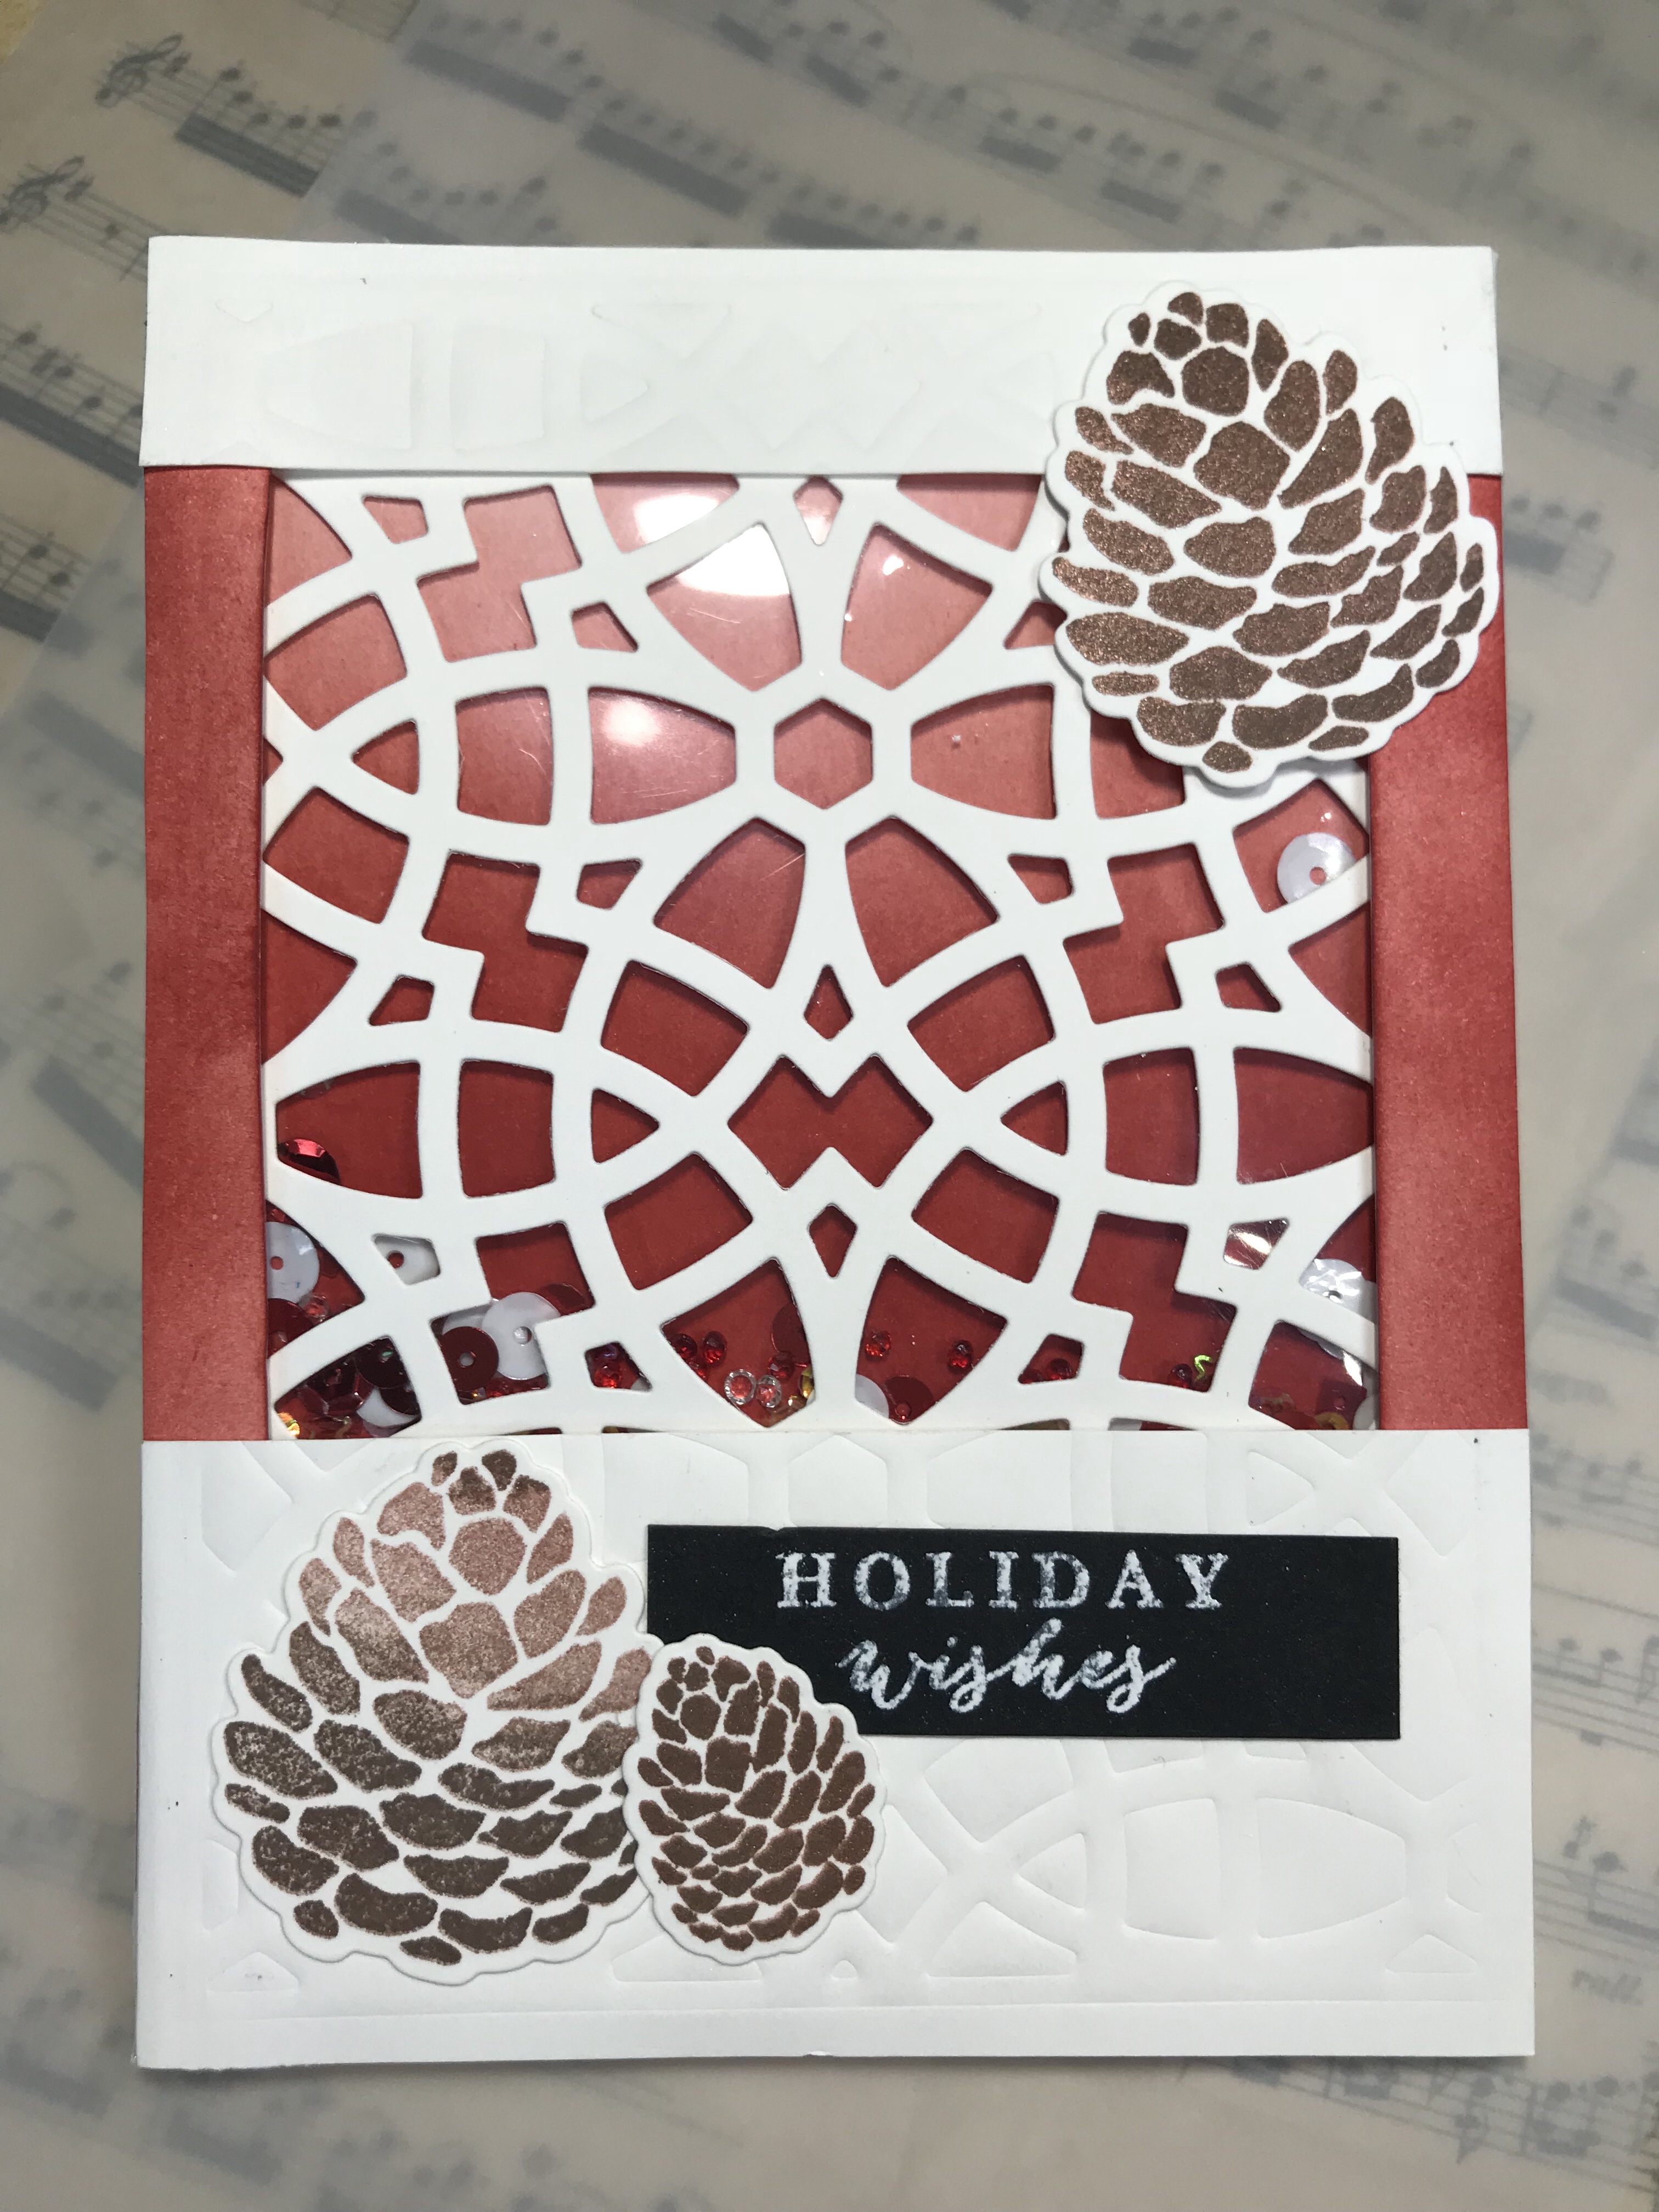
The final class focused on using several of these elements to create a holiday shaker card. Amy Lee makes her shakers using a storage envelope, so I decided to try her technique. I blended a background using fired brick distress ink, creating an ombré effect. I used my kaleidoscope background die from Elizabeth Craft Designs to create both a die cut background and an embossed background. I made the shaker pouch using the ink blended panel cut down to fit the background die, and a storage pouch from Avery Elle. I used a sequins mix in reds from Honey Bee Stamps inside the pouch. I attached the die cut background over the pouch, following Amy Lee’s directions. I lined up the embossed background to match the die cut background, attaching it to the top and bottom of the shaker pouch. I used some of the excess ink blended background to frame the sides of the shaker pouch. I stamped (Memento cocoa and brilliance coffee bean inks)and die cut several pine cones from Gina K’s Seasonal Sentiments. I stamped the sentiment Holiday Wishes from Hero Arts layering color Christmas tree set, embossing it in white on Gina K onyx black card stock. I attached the sentiment under two of the pine cones, and placed the third pine cone on the top right corner of the card.
And that completes the class. As always, I hope this inspires you to go out and create something!