Die cutting
Hello again! I can’t believe it’s the end of July already. This post was delayed slightly as my husband and I went out of town for a weekend. We had a wonderful couple of days filled with some beach walking, sand, dining al fresco, and some light trail hiking. I am home, and again ready to tackle some crafting and blogging before school resumes!
If you have been reading my blogs, you will know that I feel summer is the time for me to stretch my wings and try new things, and that I had registered for a few classes on Altenew Academy. The class I undertook last week was a die cutting class. My sisters and I (the three angels that we are) enjoyed a couple of days crafting a week ago. Carina and I, the paper crafters, decided to make it a Christmas in July session! So the cards I created, with the exception of one, have a holiday vibe while following the parameters of the class.
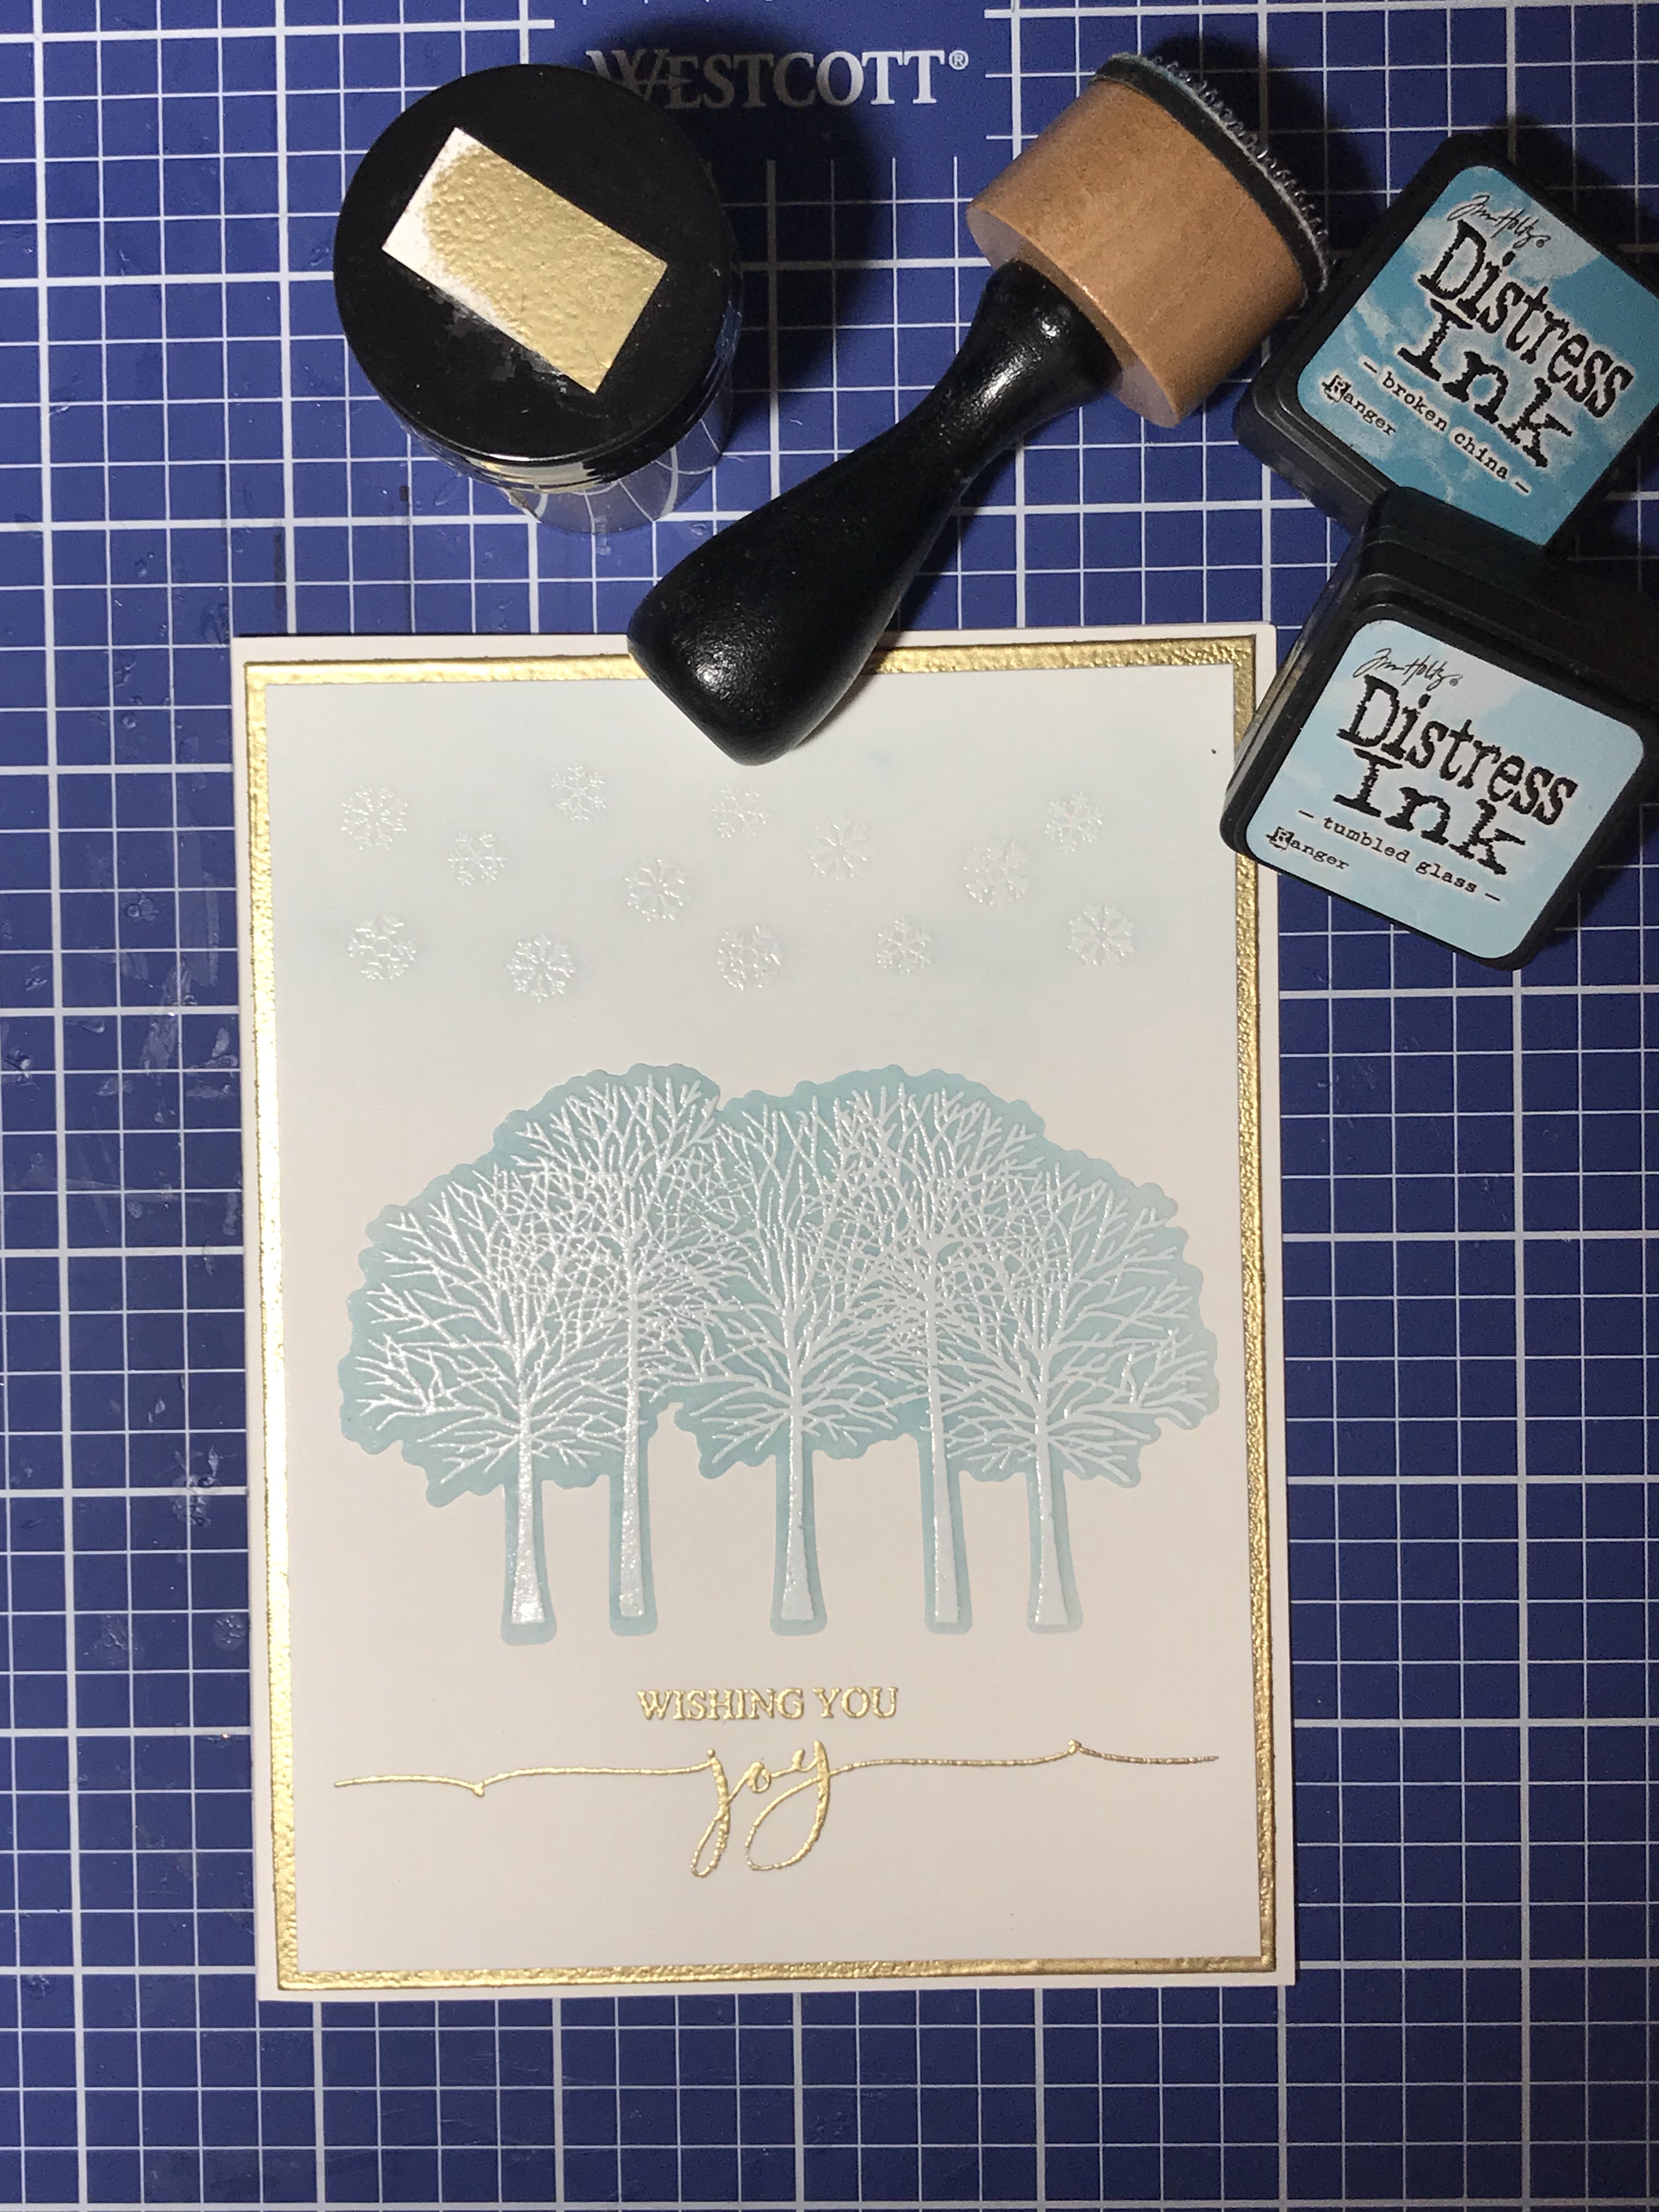
The first class was on stamping and using the matching die to cut out the stamped image. Like the instructor, I stamped the trees from Gina K’s Merry and Bright collection using Versamark ink, then heat embossed Sparkle ‘n Sprinkle’s white embossing powder. I inked the back of the vellum, using Broken China Distress Ink. I then die cut the trees using the matching die. Using ranger multi medium matte adhesive, I adhered the vellum to Neenah classic crest solar white card stock. For the sentiment, I used Gina K’s Scripty Holiday sentiment, “Wishing you joy”, again in Versamark ink, using gold Sparkle ‘n Sprinkle embossing powder. I also edged the card front in the same gold embossing powder. I then mounted the card on Neenah solar white card stock. I stamped the trees on a white envelope in pearl ink so the envelope would match the card. This card went together so quickly!
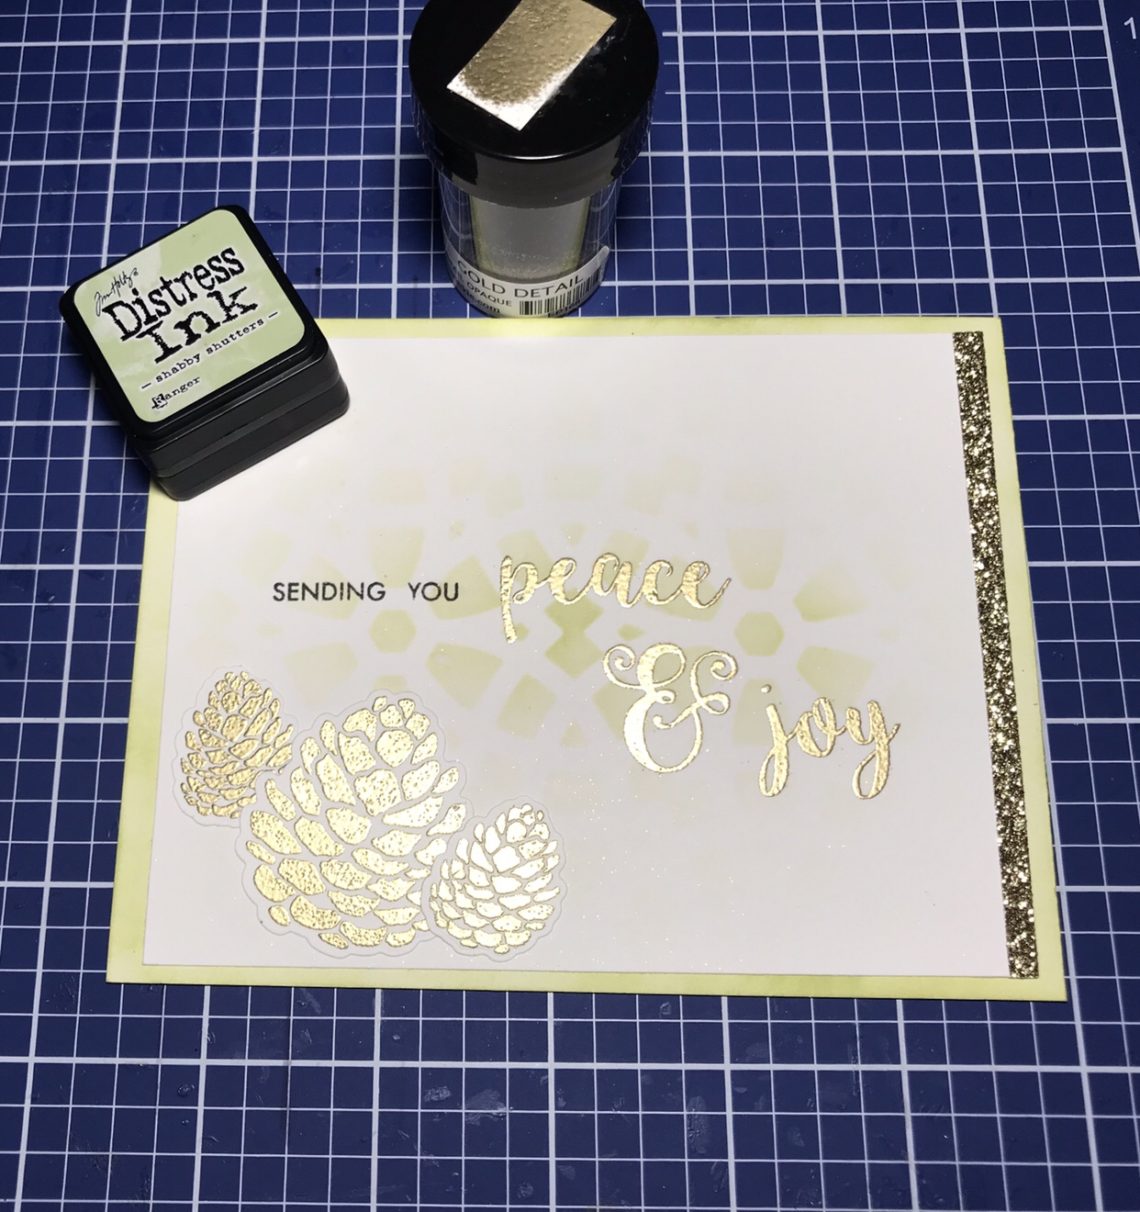
The second class was using a die cut as a stencil. I chose a kaleidoscope die from Elizabeth Craft Designs to create my stencil. I then inked only the center, and fading out from the center, on some Neenah Classic Crest Solar White card stock, using Distress Ink in Shabby Shutters. I turned to Gina K again, using the pine cones from her Seasonal Sentiments collection. I embossed the images in Sparkle n’ Sprinkle gold again, and used the matching dies to cut out three pine cones. I used an Avery Elle set, Merriest, to stamp the sentiment “sending you” (in Gina K amalgam ink) “peace & joy” (in gold embossing powder). I trimmed the card front smaller than A2, and used some gold glitter tape from Close to my Heart on the edge. I inked up the edges of a piece of Neenah solar white card stock using distress ink in shabby shutters again, and mounted the card front on the matching inked card stock. This is possibly my favorite card from this class…..

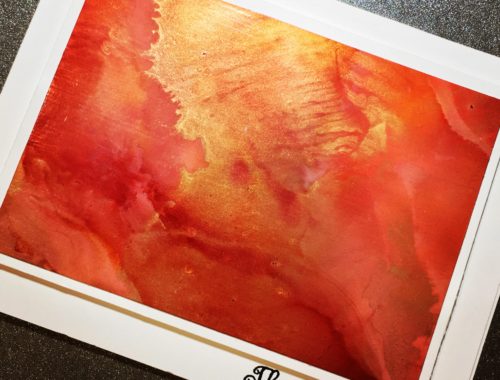
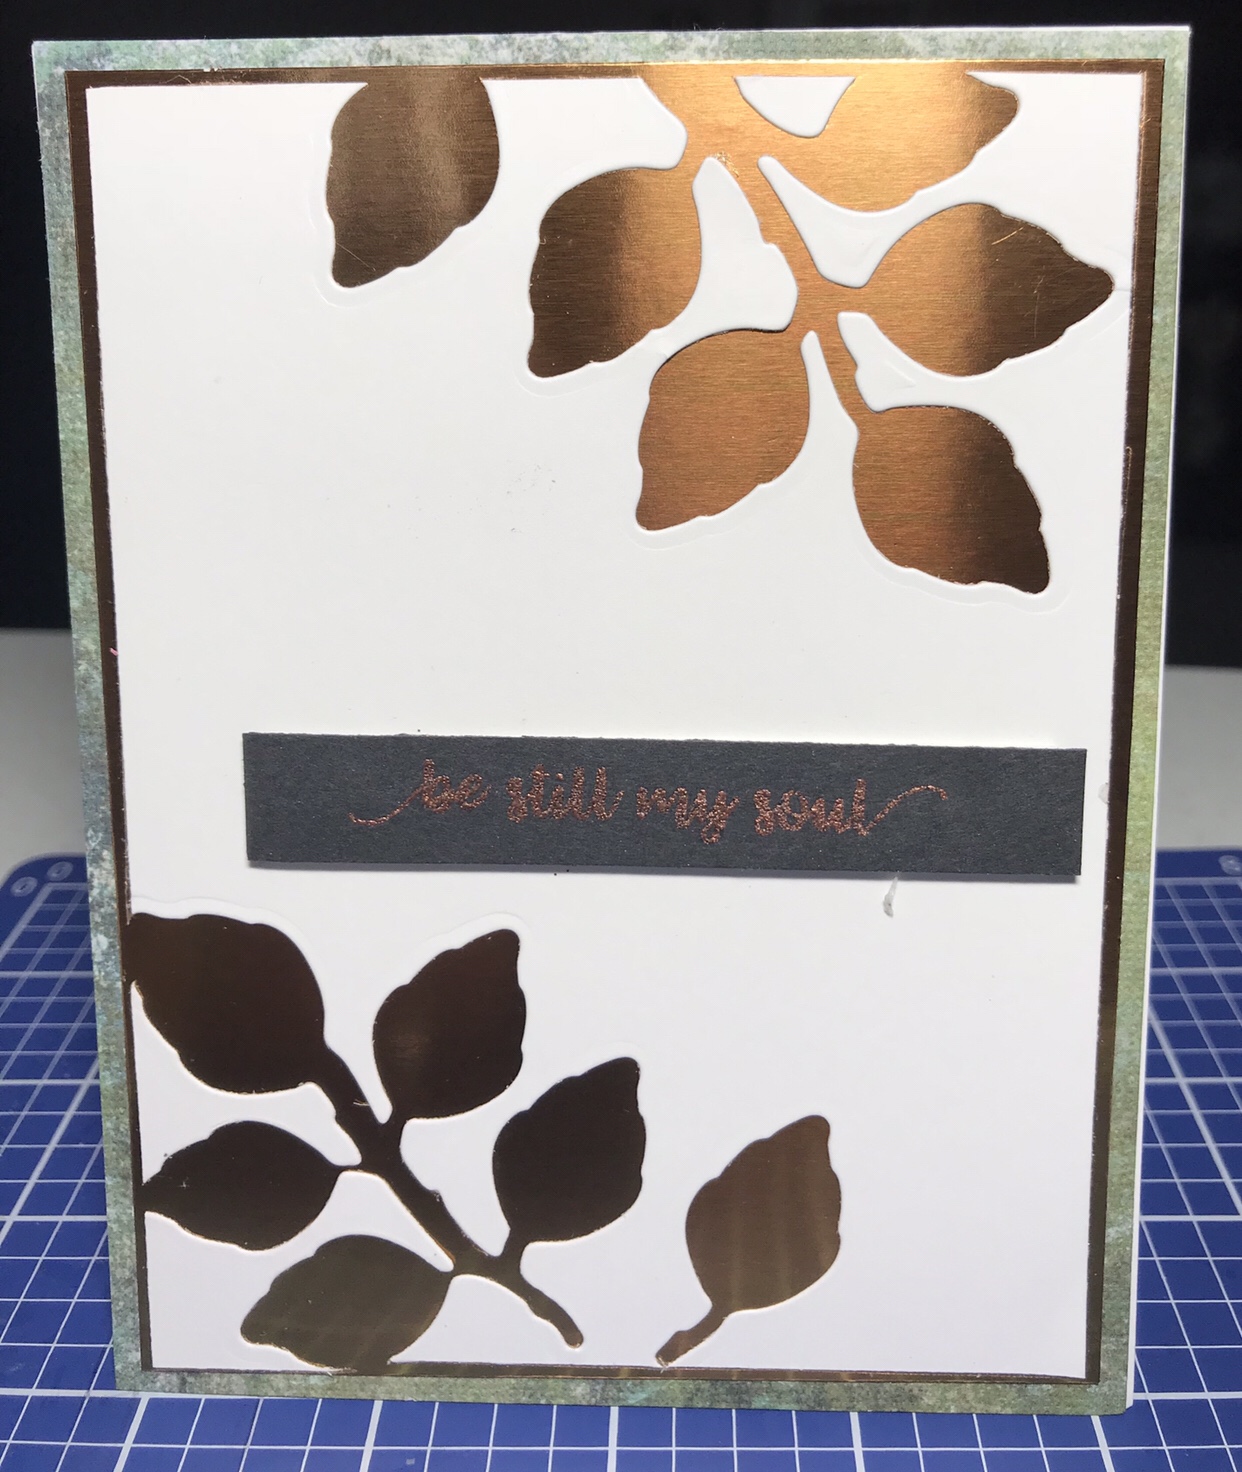
The third class was negative die cutting. I used a Spellbinders Shapebilities foliage die set to create my negative images. Like the instructor, I applied double sided adhesive to the back of Neenah solar white card stock prior to die cutting my images. I had cut the card stock smaller than A2 to start, and after the images were cut out, I mounted the card stock on copper metallic card stock, then mounted that on a green patterned paper that reminded a bit of the Verdi Gris copper becomes. I stamped the sentiment “Be still my soul” from the Inspired Words collection by Close to my Heart on Gina K black onyx, using Copper embossing powder from Sparkle ‘n Sprinkle. I cut it into a strip, and mounted that toward the center of the card using 3M foam tape to give some added dimension.
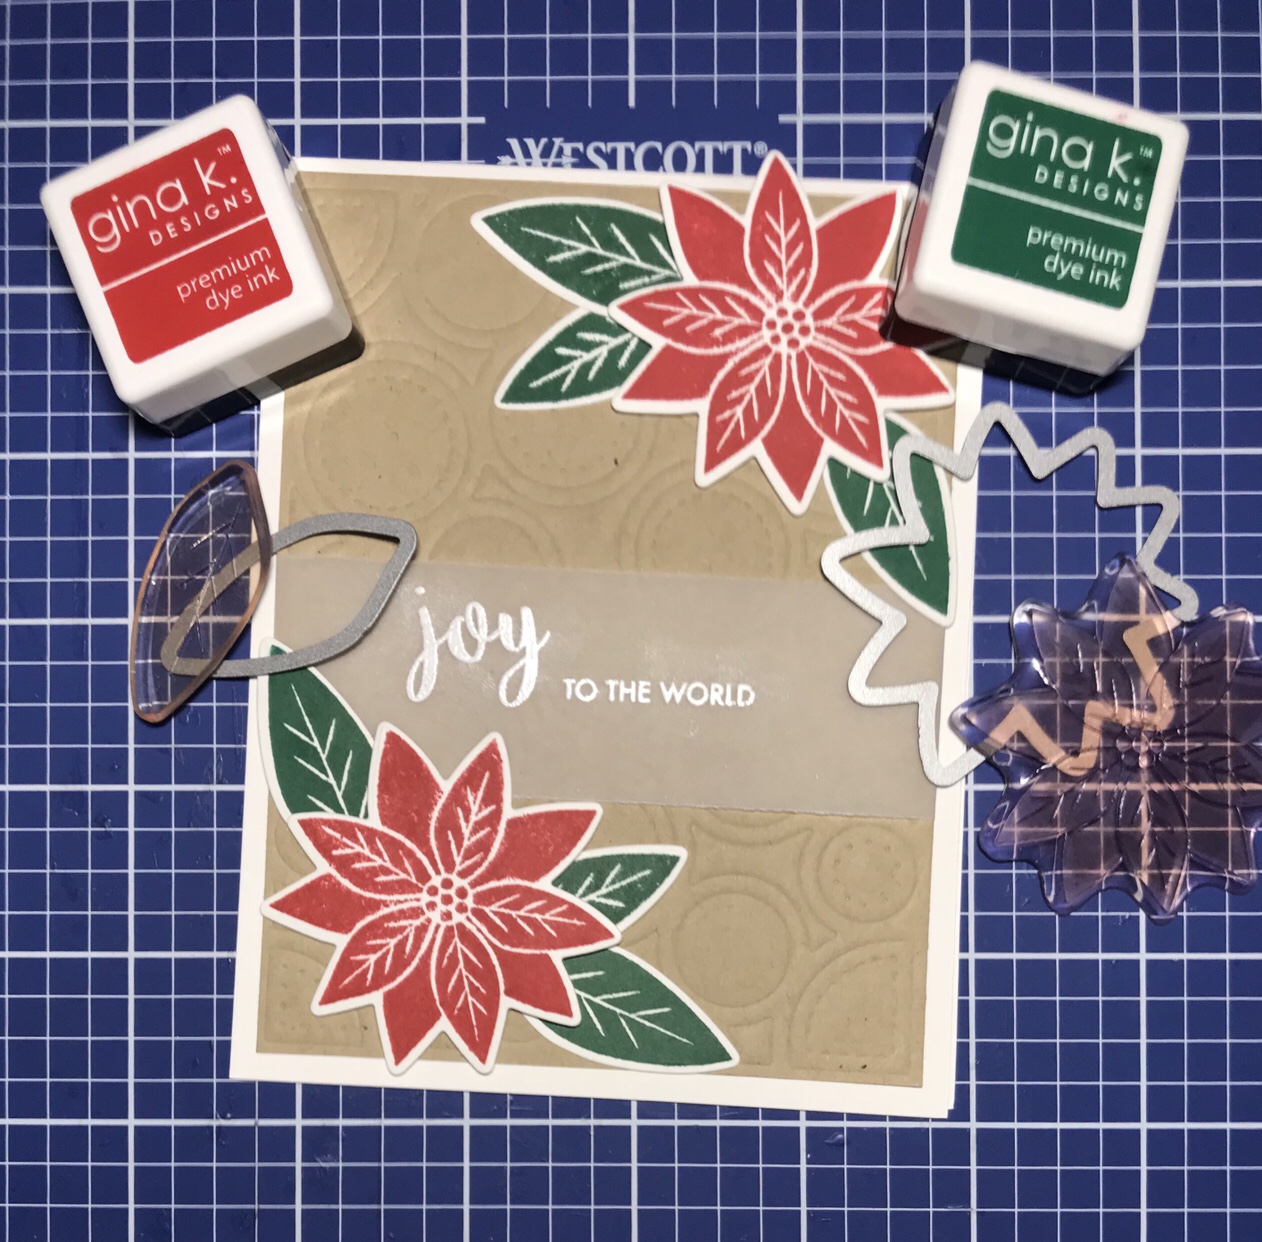
The next class focused on using dies to emboss card stock. I used my circle background die from Elizabeth Craft Designs to embossed a piece of Gina K Kraft card stock. I also used the poinsettia and leaves from her Merry and Bright Collection, both the stamps and the matching dies. I stamped the images multiple times in Gina K red velvet and Christmas pine inks. I then die cut them out and mounted the images in the corners of the embossed Kraft card stock. I returned to my Avery Elle Merriest set for the sentiment, embossing Joy to the world in white (Sparkle ‘n Sprinkle) on vellum. I wrapped the vellum sentiment around the middle of the embossed Kraft card stock, and mounted the whole card front on a Neenah solar white card base, allowing flower petals and leaves to hang over slightly.
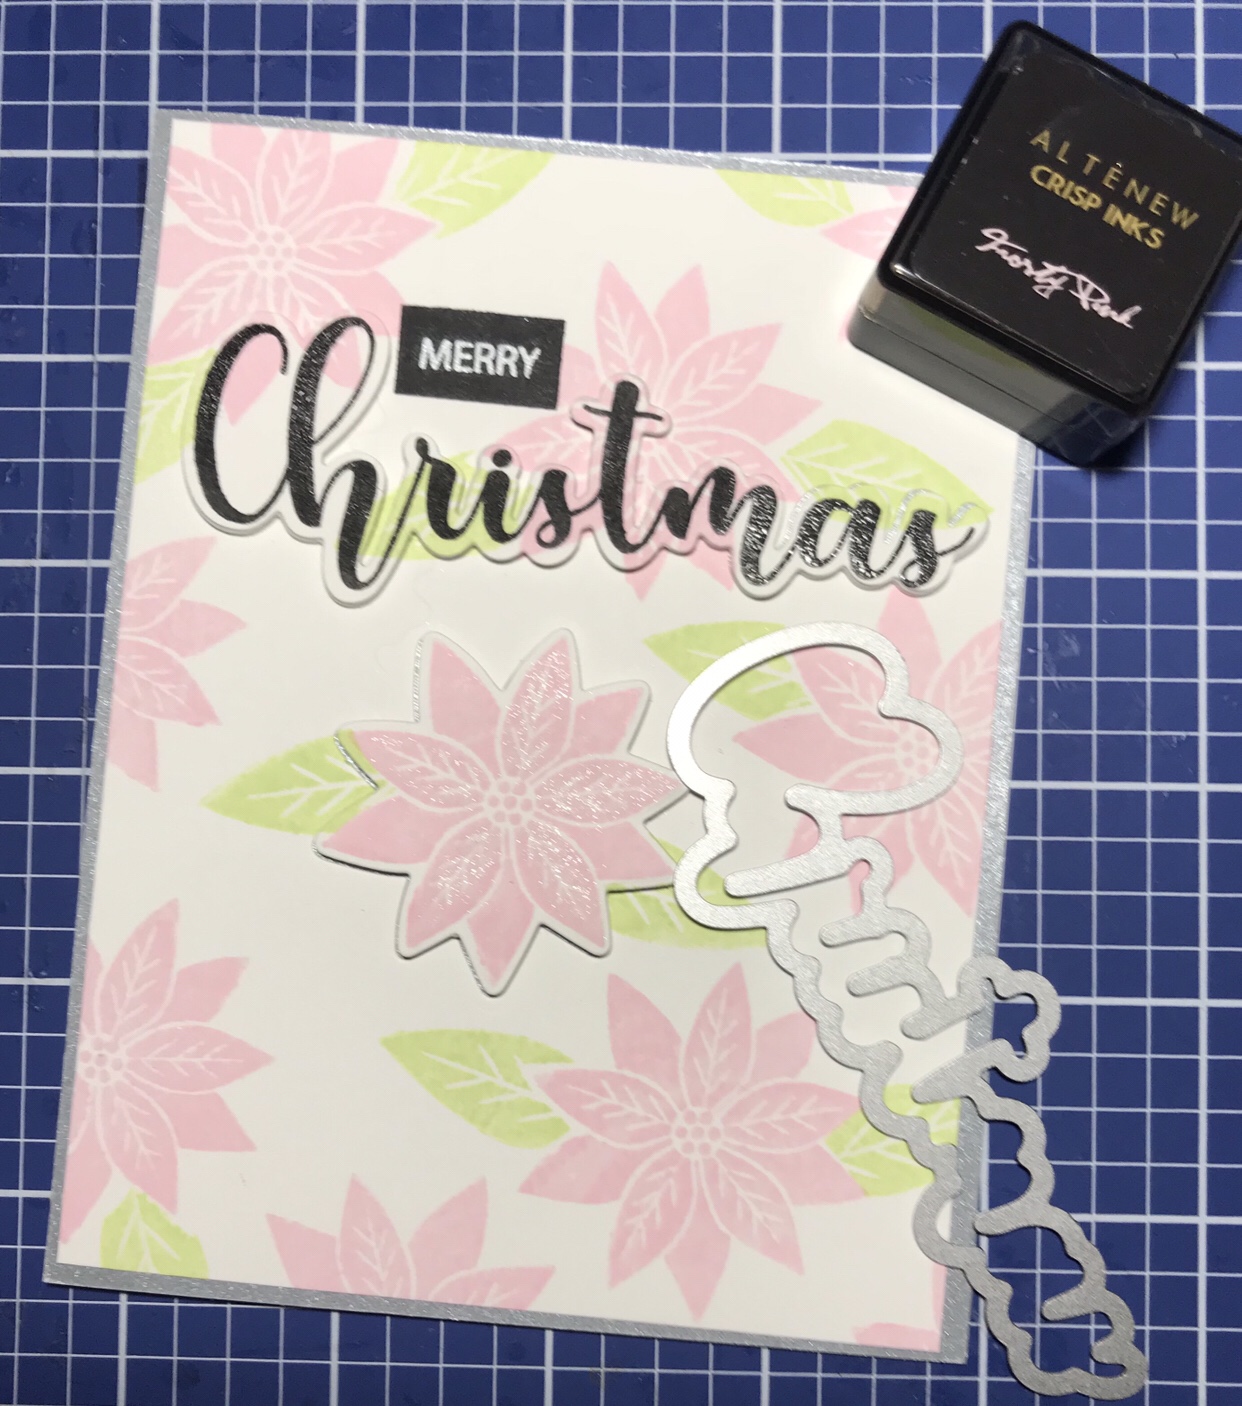
Next up was class 5, inlaid die cutting. I turned once again to my Gina K Merry and Bright and Seasonal Sentiments stamps and dies. Using more Neenah solar white card stock, I stamped several of the smaller poinsettias randomly in frosty pink Altenew ink. I used Altenew frayed leaf ink to stamp a few leaves, as well. Using Gina K amalgam ink, I stamped Christmas on the top third of the background, then embossed it in clear Sparkle ‘n Sprinkle embossing powder. I used the matching die to cut out Christmas, and also cut it out of craft foam, adhering the two together. I then fit the dimensional word back into the negative space created on the background, and stamped the word Merry using white embossing powder on black onyx card stock, mounting it just to the right of the “C” Of Christmas. I also die cut one poinsettia and mounted it back in the negative space using foam tape to give it some dimension. I added some shimmer to that poinsettia using my Spectrum Noir shimmer pen. I liked the non-traditional colors of pink and a softer green on this card.
The final class was to create a holiday themed card…. 😁. I used a contour edge die from Simply Refined’s Trimming The Tree collection to create a swirling background. I ran the die through two different times, having the curved edges line up in the center of the card front. I returned to my Gina K Seasonal Sentiments stamp and die set to emboss several snowflakes in white Sparkle ‘n Sprinkle, then die cut all of the embossed snowflakes, along with several extras. I stacked two of the plain snowflakes underneath each embossed snowflake, gluing them together using Multi Medium Matte adhesive. I placed an acrylic block on top to hold them in place, and while they dried, I inked up the embossed card stock using tumbled glass and broken china distress ink. For the sentiment, I chose “Let it snow” from Hero Arts layering Color Christmas tree set, embossing it in Silver (Sparkle ‘n Sprinkle) on a strip of Solar White Neenah card stock. I trimmed the card to 4″ x 5 1/2″ and mounted it on silver shimmer paper from my stash, then mounted the card front on a card base made from Neenah Classic Crest solar white card stock.
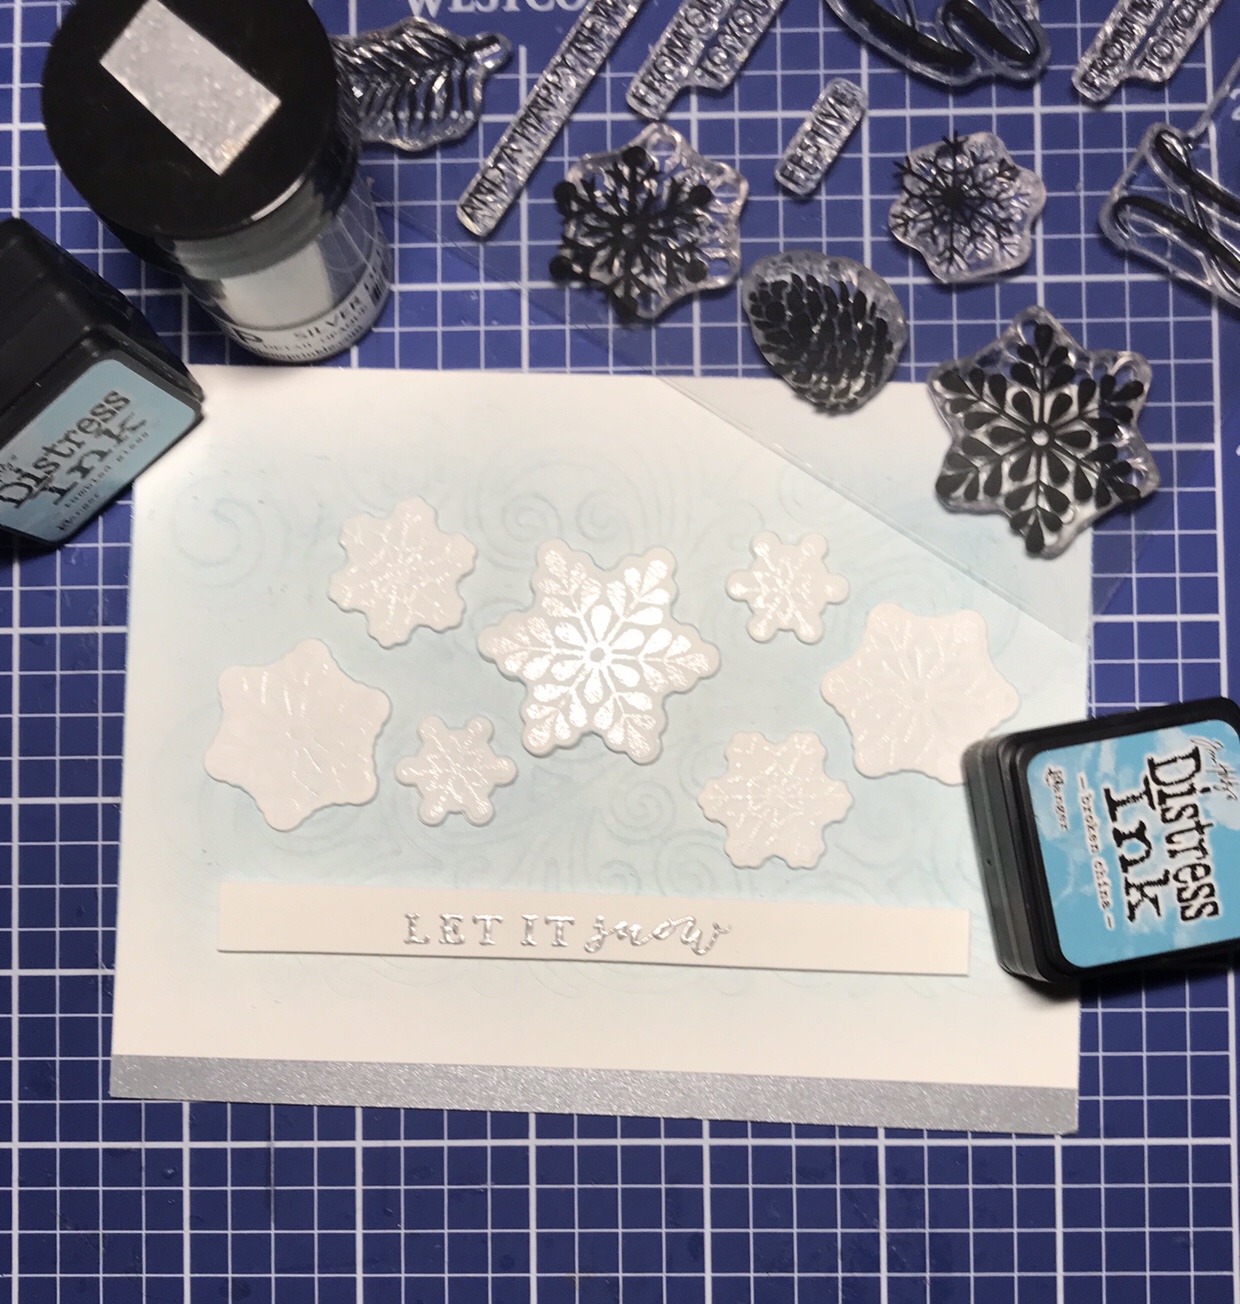
I really loved how the contour edge die created the blowing wind effect I was trying to achieve. And how it stretched my use of this die!
Thank you for reading our blog, and as always, I hope this inspires you to go out and create something!